The offensive usage of SCCM has become a big topic in recent months and years. In this article, I will cover the basics of SCCM and how to configure an SCCM lab from scratch. I also have another article which shows the currently known attack vectors involving SCCM.
As with every article on SCCM, lets do a quick recap on what it actually is and what it is currently called by Microsoft.
SCCM History
SCCM has had a range of names over the 19 years since the original Systems Management Server 1.0 was released. Thanks to Wikipedia:
In 2007, System Management Service (SMS) became System Center Configuration Manager (SCCM).
In 2019 Configuration Manager moved to the Microsoft Endpoint Manager suite.
In 2023 the term “endpoint” was removed to rename the product to Microsoft Configuration Manager (MCM).
For this article, I will just refer to it as SCCM, rather than MECM or MCM.
SCCM Structure
Due to its usage as a software and configuration deployment product, SCCM is designed to work reliably across large and complex estates without causing bandwidth and latency issues. For example, in a distributed network you potentially wouldn’t want your US office reaching out to the UK office for updates – you would want to have a dedicated server in both the UK and US.
To learn more, we can use Microsoft’s own guidance to show us the basics, which I will paraphrase below.
Stand-Alone Primary Site
Starting with the simplest possible SCCM network, we would have one single ‘site’ to handle deployments. This would be known as a stand-alone primary site. Each site has a unique 3 letter code to refer to it, so we will use LON to represent London. A site is a logical way of grouping clients together, and is typically used to group by geographic location (For reasons mentioned earlier!).

Secondary Sites
If our fictitious office was to expand, we might have sites in Manchester (MAN) and Edinburgh (EDI):
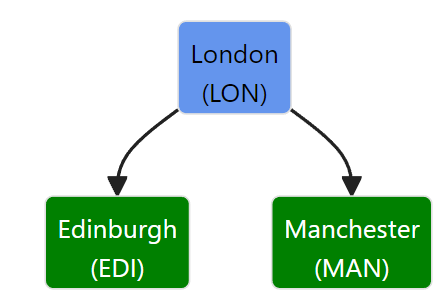
In this example, we would add in the EDI and MAN sites as secondary sites, shown in green above. In the words of Microsoft, a secondary site:
Provides support for devices in the remote location. It provides support by compressing and then managing the transfer of information across your network that you send (deploy) to clients, and that clients send back to the site.
As pointed out by Phil Keeble (Nettitude), secondary sites contain their own SQL databases. It isn’t possible to manage clients from a secondary site, any requests have to come from the primary site above it. For example, if we were to deploy an application to a client in Edinburgh (EDI), an SCCM admin would login to the London (LON) primary site, select the Edinburgh-based asset and deploy.
Central Administration Site
Finally, if our fictious office merged with another firm in the US, we might see a structure such as this:
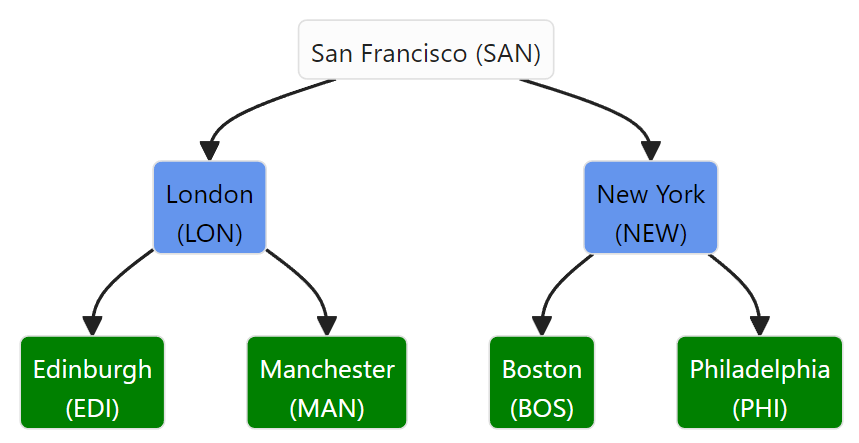
San Francisco (SAN) would be a central administration site in this example. Central administrationsites are suitable for “large-scale deployments, provides a central point of administration, and provides the flexibility to support devices that are distributed across a global network infrastructure”, but they do not “directly support management of devices, which is the function of a primary site”.
Central Administration sites only apply when we are managing more than 100,000 clients, so wont be featuring in our labs!
Summary
| Site Type | Usage |
|---|---|
Central Administration Site (CAS) | Provides a central point of administration for large & complex networks |
| Primary Site | Manages devices in its site, or any connected secondary sites |
| Secondary Site | Relays deployments from its primary site, allowing for distributed management in areas with lower bandwidth |
Roles
Each site has one or more ‘site system servers’, these are servers or workstations which have had a ‘site system role’ installed on them. These roles allow for additional features to be added into the site or SCCM network as a whole. Some of the core roles are:
Site System Role
As mentioned before, this role is installed on any device which is a Site System Server. This contains the core functionality to allow SCCM to work.
Site Database Server
This is for devices which store a copy of the sites database file.
SMS Provider
The SMS Provider provides read/write access to the Configuration Manager DB at a site via a WMI provider. Each Central Administration Site and Primary Site require one server with this role.
Other Roles
There are a range of other roles, though we only really care about the Distribution Point and Management Point for the purpose of attacking SCCM. Despite this, it is interesting to see what else SCCM supports (and could be exploitable from…). I will cover the non-deprecated ones below:
| Role | Usage |
| Cloud Management Gateway Connection Point | Used to manage Configuration Manager clients over the internet. |
| Data Warehouse Service Point | Store and report on long-term historical data |
| Distribution Point | One of the key roles associated with SCCM, this role allows for items to be downloaded by clients. This can be anything from software packages through to OS images. |
| Endpoint Protection Point | Manages Microsoft Defender settings for devices in a site. Has to be installed on the highest tier within your SCCM environment. |
| Exchange Server connector | Allows non-on-prem devices to connect to an on-prem Exchange instance, allows for very basic MDM. |
| Fallback Status Point | Monitors devices which are cannot connect to their management point and so are unmanaged. Only available on primary sites |
| Management Point | Provides policy and service location to clients, as well as receiving config data from clients. |
| Reporting Services Point | Integrates with SQL Server Reporting Services to create reports for SCCM |
| Service Connection Point | Downloads updates for SCCM, synchronise apps from Microsoft Store and discover users and groups within AAD |
| Software Update Point | Integrates with Windows Server Update Services ( WSUS ) to provide software updates |
| State Migration Point | Stores user state data when migrating a devices to a new operating system |
Special Accounts
SCCM has several special accounts, but we will focus on 2 in particular: The ‘Network Access Account’ and the ‘Client Push’ account. Both of these facilitate and feature in a lot of attack paths, so we will become quite familiar with them!
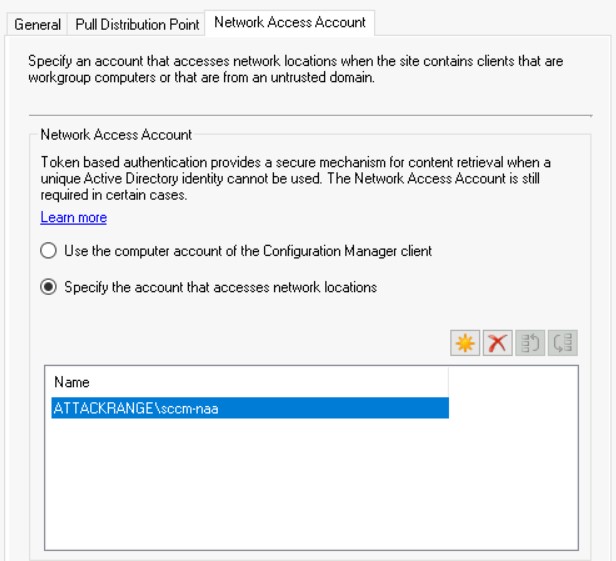
Network Access Account (NAA)
The NAA account is used by clients from untrusted domains to access resources on the network. For example, if a new device is joined to an SCCM managed domain, the NAA could be used to load scripts and resources from the domain.
Client Push
Client Push accounts are used to deploy the SCCM client onto clients we wish to manage. The down side of this is that these accounts require local admin access to any boxes which they need to manage (to install the client), so are ripe for exploitation.
Other SCCM Functionality
SCCM has a lot of functionality, I will cover some of the other key functionality here:
PXE Boot
We can use PXE booting (Or PXE OSD as its otherwise known) to deploy OS’s to devices as they are connected to the network. This process can be exploited with PXEThief, but thats one for another day…
Task Sequences
MWR have a great blog post on Task Sequences, which is well worth reading. In short, Task Sequences effectively allow us to break down the process of performing some sort of IT operation into multiple steps.
For example, deploying an OS onto a remote machine means we need to format the drive, install the OS, update the OS and so on. Each of those steps would be considered as part of a Task Sequence in SCCM. These sequences can contain variables, which are known as ‘Collection Variables’. These can contain juicy details such as credentials or other secrets.
Running A Script
Like all good C2’s (aka IT Management Tools), we can also run a script on a machine of our choosing. Obviously this wont be abused in any way…
Creating An SCCM Lab
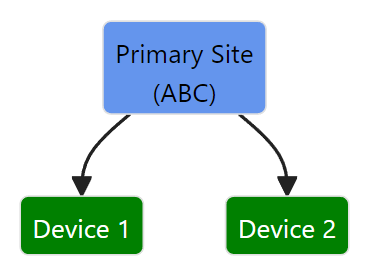
After all of that theory, lets make a fairly basic SCCM lab. Microsoft offer pre-built labs (thanks to _Mayyhem) or XPN recommends Automated Lab in one of their posts. Finally, @an0n_r0 has shared a SnapLabs template, which I used in my other blog post on attacking SCCM. If you want to build your own, then read on to produce a site with the following structure:
We will assume that we have a freshly installed version of Microsoft Server. In this case, I will use Server 2019. To start with, I will download Microsoft Configuration Manager and follow the guide by SystemCenterDudes. I went against the standard guidance here, and just installed everything onto one drive – obviously this has significant implications for a production workload, so be careful!
Before you get started, consider these pointers for installing within a lab:
- Use a NETBIOS name shorter than 15 chars (i.e.
SCCM01) - Provision at least 80GB for storage – SCCM requires 15GB spare storage before allowing final installation, with the SQL & Windows Server components taking up ~35GB before SCCM is installed
Creating AD Groups
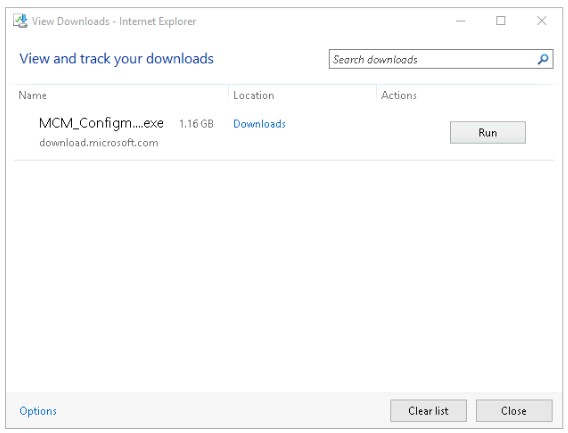
On our blank server, we will start by downloading and installing the MCM file.
Whilst this was downloading and extracting, I created the accounts required on the DC. I also made the sccm-admin account a local admin on the Primary Site server.
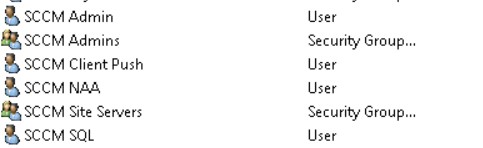
My AD accounts are as follows:

I then installed the pre-requisites for a SCCM primary site using the command provided in the guide. To do this, I spawned an administrative PowerShell session and ran the command below:
Get-Module servermanager
Install-WindowsFeature Web-Windows-Auth
Install-WindowsFeature Web-ISAPI-Ext
Install-WindowsFeature Web-Metabase
Install-WindowsFeature Web-WMI
Install-WindowsFeature BITS
Install-WindowsFeature RDC
Install-WindowsFeature NET-Framework-Features -source \yournetwork\yourshare\sxs
Install-WindowsFeature Web-Asp-Net
Install-WindowsFeature Web-Asp-Net45
Install-WindowsFeature NET-HTTP-Activation
Install-WindowsFeature NET-Non-HTTP-Activ
Whilst those were installing, I went to the location where I extracted the SCCM installation resources to, then navigated to SMSSETUP\BIN\X64\extadsch.exe , which will extend the schema of our AD to support SCCM.
Following the System Center Dudes guide, don’t be tempted to skip the ADK installation step, as it is a pre-requisite for the SCCM installation! The latest download URL has changed from the one in their guide.
SQL Server Setup
I then installed SQL Server 2022 Developer. After it had installed correctly, I had a warning about the firewall to ensure all valid ports are open, something we sorted earlier thanks to the batch script. I then unchecked the Azure Extension for SQL Server .
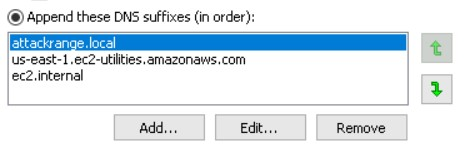
A few steps later I had an error saying that the RPC server was unavailable, this was fixed by following this guide and adding my AD domain name (attackrange.local) to the DNS suffixes.
I then skipped the SQL Reporting Services, because yolo (aka we are in a lab). I also skipped SQL Cumulative Update (CU), because we just downloaded the latest version from Microsoft, and I’m not too bothered about having the latest and greatest version.
Terrific!

Whilst SSMS installed in the background, we can create some SPNs. Notice that the username has been changed from yourdomain\SQLSA in the guide to ATTACKRANGE\sccm-sql, which is the name I was using for the SQL admin account in my lab.

setspn -A MSSQLSvc/SCCM-PRIMARY:1433 ATTACKRANGE\sccm-sql
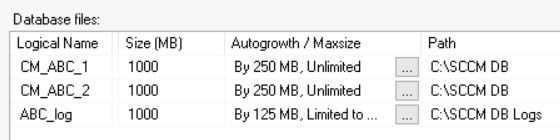
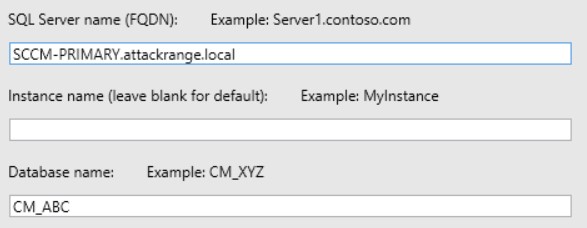
setspn -A MSSQLSvc/SCCM-PRIMARY.attackrange.local:1433 ATTACKRANGE\sccm-sqlWe can then configure the SQL DB using the following optional command, where ABC is the site code of the primary site. I have modified the command in the guide as I am using a single drive on the server in my lab, and have also reduced the DB table sizes.
USE master
CREATE DATABASE CM_ABC
ON ( NAME = CM_ABC_1,FILENAME = 'C:\SCCM DB\CM_ABC_1.mdf',SIZE = 1000, MAXSIZE = Unlimited, FILEGROWTH = 250)
LOG ON
( NAME = ABC_log, FILENAME = 'C:\SCCM DB Logs\CM_ABC.ldf', SIZE = 1000, MAXSIZE = 2000, FILEGROWTH = 125)

ALTER DATABASE CM_ABC
ADD FILE ( NAME = CM_ABC_2, FILENAME = 'C:\SCCM DB\CM_ABC_2.mdf', SIZE = 1000, MAXSIZE = Unlimited, FILEGROWTH = 250)
When this is run, we should end up with the following tables.
Next we need to modify the TempDB table.
USE master
GO
ALTER DATABASE tempdb MODIFY FILE (name='tempdev', filename='C:\SCCM DB\TempDB.MDF', SIZE= 500, MAXSIZE = 2000, FILEGROWTH = 125)
GO
ALTER DATABASE tempdb MODIFY FILE (name='templog', filename='C:\SCCM DB Logs\TempLog.LDF', SIZE= 500, MAXSIZE = 2000, FILEGROWTH = 125)
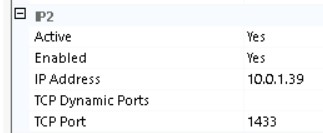
GOWe then enable our IP2 interface to allow the SQL server to be accessed.
Installing SCCM
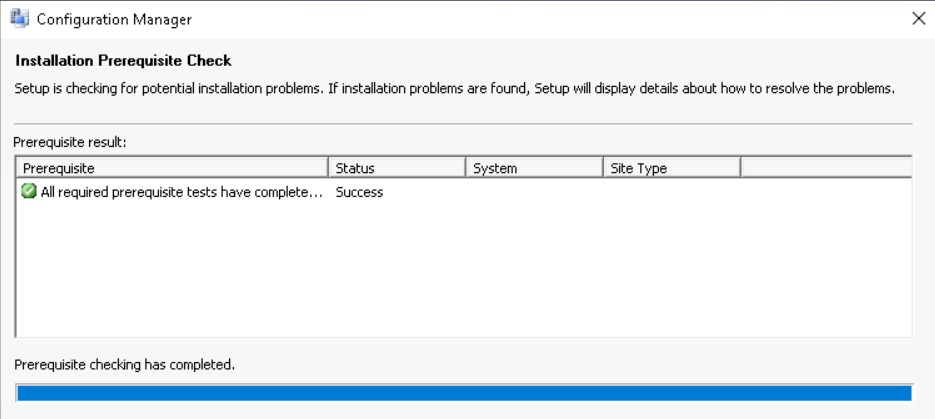
Running prereqchk.exe shows that we meet all of the pre-requisites!
Now we run the splash.hta file to install SCCM – yes that’s right, we use a HTA file to install SCCM. We will install this as an evaluation, which has a healthy 180 day demo.
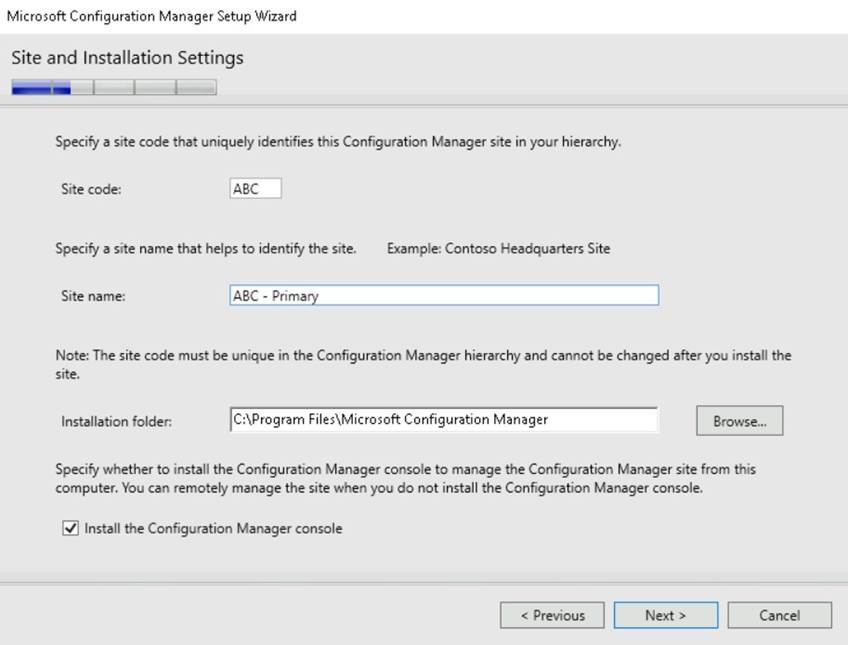
Let SCCM download the files we need and we will set up our primary site.
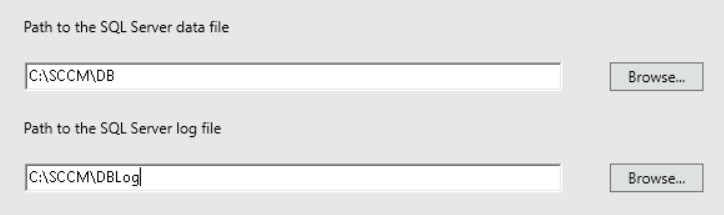
I then set the logs to be the same folder as before
Use the default names for the Management Point and Distribution Point.
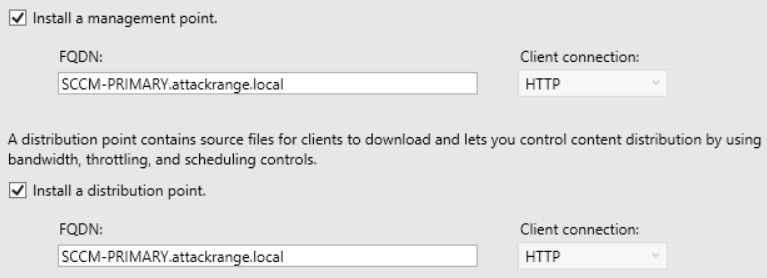
And we can now see the magic button!
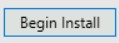
This can take a while, so grab a tea and let it run! For reference, the guide states around 15-30 mins to install, it took 57 minutes on a 2vCPU, 8GB RAM VM.
We now have a primary site in our SCCM lab!
Management Point
We will now create a Management Point, so we can manage devices within our lab. As a reminder, Management Point’s manage the communications between our primary site and the clients under our control. This can be anything from distributing software updates to individual files.
Again, we will follow the guide by SystemCenterDudes,as well as using PatchMyPC’s video.
We will install the Management Point on our primary site, as mentioned by the guide:
The Management Point is a site-wide option. It’s supported to install this role on a stand-alone
Primary site, child Primary site or Secondary site. It’s not supported to install a Management Point on a Central Administration site.
From our previous installation, we will have pre-installed all of the necessary requirements. In a production workload we might not necessarily install a management point on our primary site server so YMMV!
Quick Theory Lesson
Management Points have a lot of concepts floating around them, as they are designed to be robust, yet flexible in the way they identify and manage devices. This means it is quite complex to just add a few devices in a lab setting!
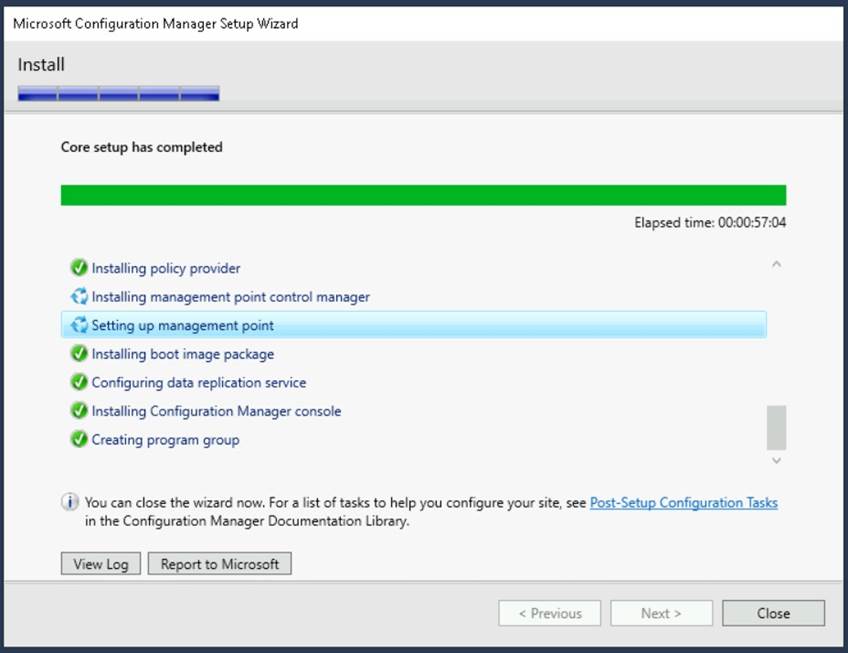
Below is a high level description of how the concepts link together, as I found it a little confusing to start.
To manage devices, we will create a new ‘device collection’. Initially I will make a group in AD which will contain all of the devices I want to manage.
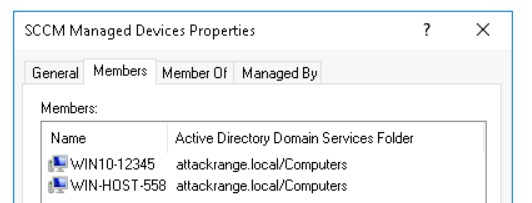
The two devices are:
| Device Name | Description |
WIN10-12345 | Windows 10 |
WIN-HOST-558 | Windows Server 2019 |
We will configure our site to automatically install the SCCM agent.
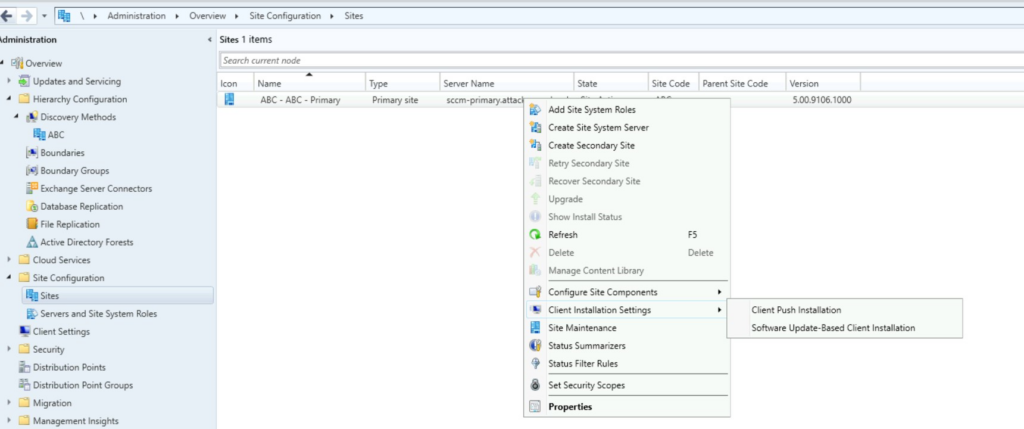
We will then enable 'Automatic site-wide client push installation' and 'Allow connection fallback to NTLM', due to it being a pre-requisites for the SCCM Site Takeover attack. In reality, there are other (more secure) ways to deploy the SCCM client to the estate – but I want to be insecure for my lab.
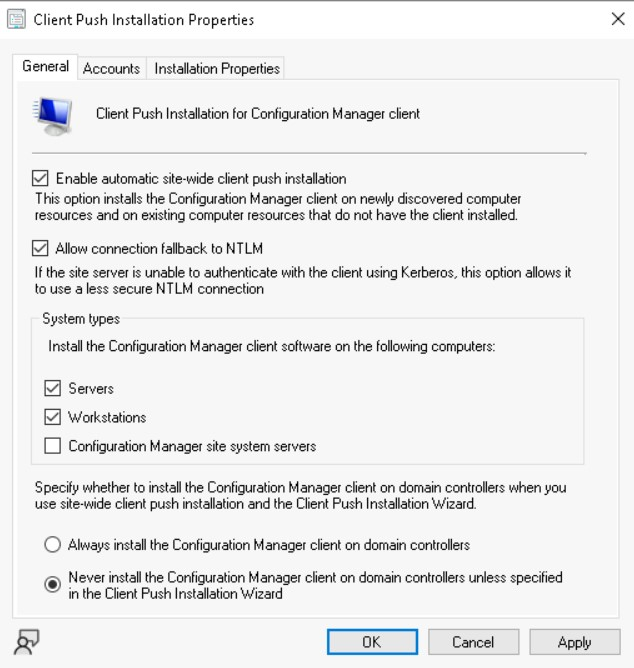
Note the 'Configuration Manager site system servers' and 'Always install MCM on DCs' options – these could be 2 potential options for further lateral movement into higher tiers, whilst blending in with legitimate looking traffic.
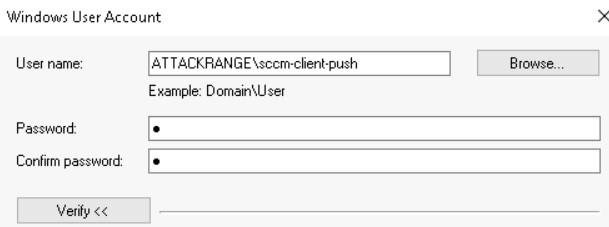
On the Accounts tab, we will enter the details for ATTACKRANGE\sccm-client-push. If we don’t specify an account, then the site server will attempt to connect using its computer account…
Back on the ‘Sites’ view, we will click on Configure Site Components and then on Software Distribution. Click on Network Access Account and then enter in the details of our sccm-naa account as before.
Boundaries
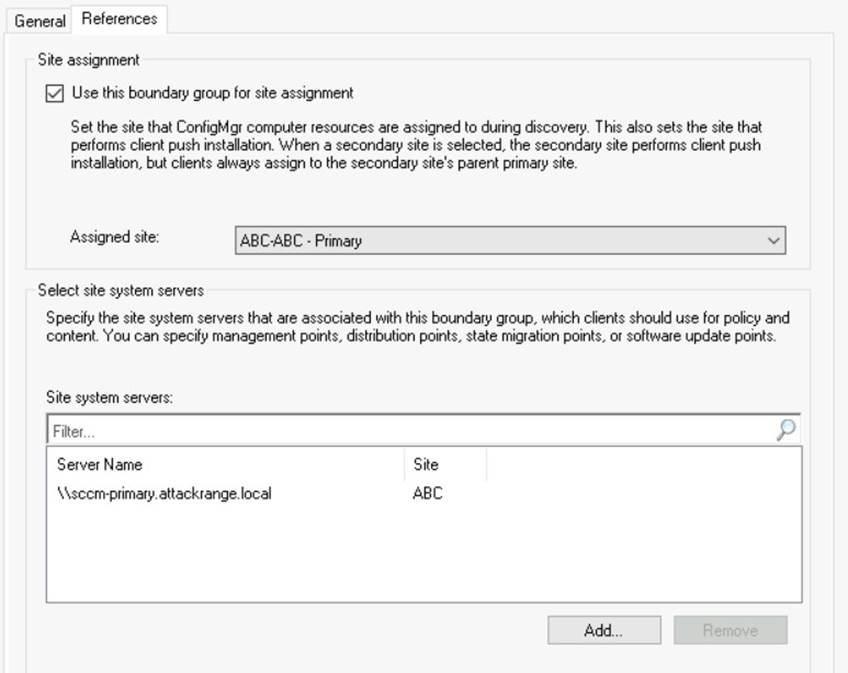
Create a boundary group by going to Administration -> Overview -> Hierarchy Configuration -> Boundary Groups -> Create Boundary Group . I will name mine Main ABC Boundary . On the References tab we will set Use this boundary group for site assignment and configure our Primary Site as the site system server.

We will go to Administration -> Overview -> Hierarchy Configuration -> Boundaries and create a new Boundary based on an AD Site

In the Boundary Groups, we will add the group we just created. We will now make a group policy to configure the firewall settings, so that we can actually push data from SCCM onto the devices. To do this, create a group policy and navigate to Computer Configuration -> Policies -> Windows Settings -> Security Settings -> Windows Firewall.. -> Windows Firewall... -> Inbound Rules.
Right click and add a new rule, then select WMI from the Predefined radio button. Select all options and click OK. Do the same process for the pre-defined ‘File and Print Sharing‘ firewall rules. We now have a selection of new rules.
It is a good idea to run gpupdate \force on any devices you want to join to the network – without these firewall rules above they wont connect!
Discovery
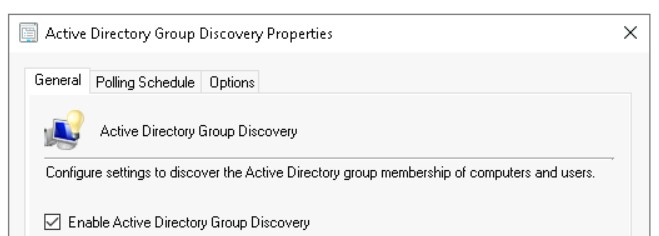
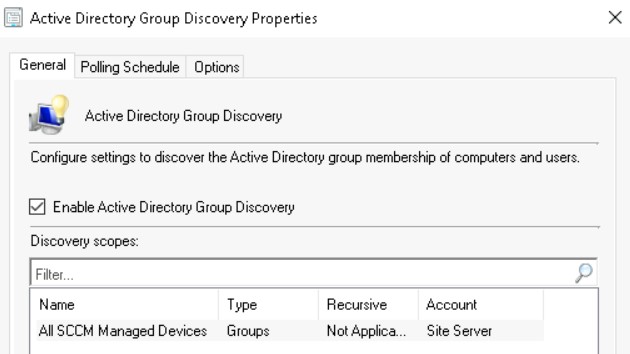
As detailed by this guide, using MCM on the primary site we will go to Administration -> Hierarchy Configuration -> Discovery Methods -> Active Directory Group Discovery. In my case, I had to enable the discovery method by double clicking on the entry and enabling it.
Right click and click on Properties, then on Add and Groups. In the Groups box, we will click on Browse and search for our AD groups which we want to look in for devices to manage.
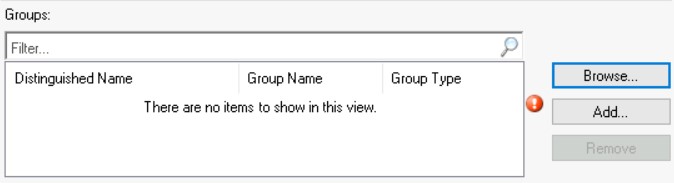
Confirm these dialogs, and the devices will appear in SCCM.
Let this run for a while, and we should have our devices call in!

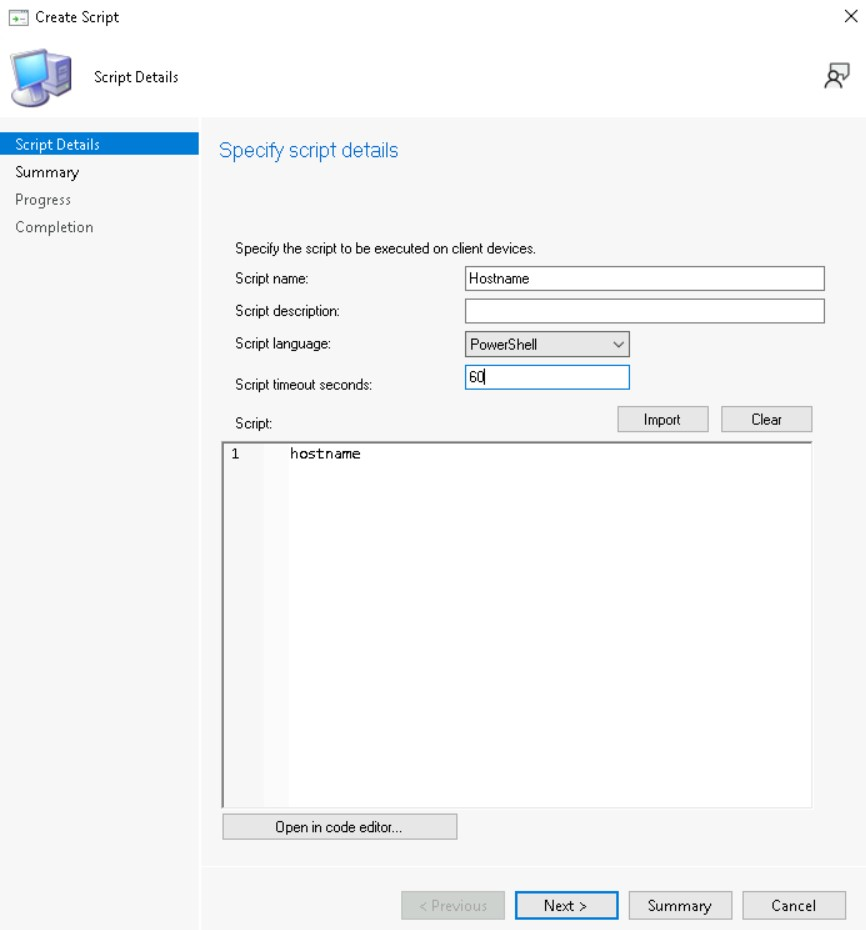
Run A Basic Script
To prove we have SCCM working properly, I will make a very basic script to run the hostname command.
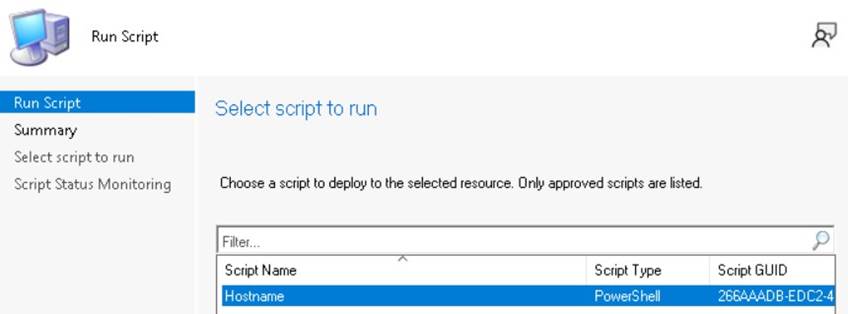
I will then disable script approval by going to Administration -> Sites -> Hierarchy Settings -> General Tab and then uncheck 'Script authors require additional script approver'.
After approving the script, I will run it against WIN-HOST-558.
Which we can see has run on the system:
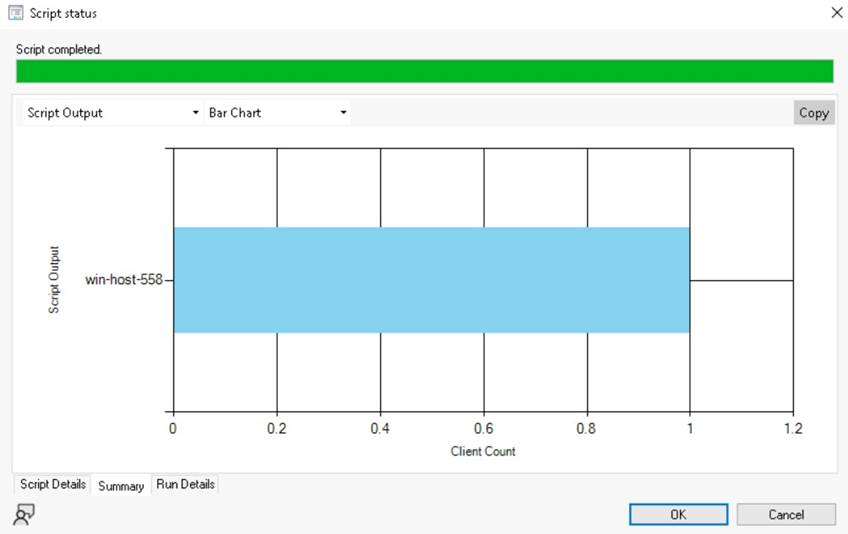
And that’s it, we have a lab! From this point we can perform most of the attacks apart from those which require PXE.