In my previous post, I covered the basics of BloodHound. In this post I will dive into the Cypher query language but we will focus on using it from an assessment/auditing angle – rather than as an attacker. Being able to quantify and detail the issues which exist in a large AD estate is an extremely powerful way of reducing the internal attack surface, forcing attackers (or red teamers!) to become more noisy.
Additionally BloodHound can help to focus remediation efforts, instead of blindly trying to remediate hundreds of users with weak passwords, BloodHound can show the level of access that each account has. This data can be analysed to allow prioritised remediation to be performed on the most powerful accounts first, helping to better secure your environment much faster!
What is Neo4j?
As a brief explainer, BloodHound is a nice GUI which sits on top of a neo4j graphing engine. Neo4j uses the ‘Cypher‘ query language, which we can then use to directly query the raw AD data which neo4j is storing. This allows us to produce more complex queries than are possible within the BloodHound GUI. In particular it allows us to generate tables and calculate certain values (i.e. How many users have admin access to another system? How many of them are kerberoastable?)
The query structure is slightly unusual, but it does have a fair amount of similarity to SQL. The main function we will use is the MATCH operator, which allows us to query the dataset in a similar way to SELECT would in SQL. To access the Neo4j console, we will navigate to localhost:7474 on our machine which is running Neo4j.
A Basic Query
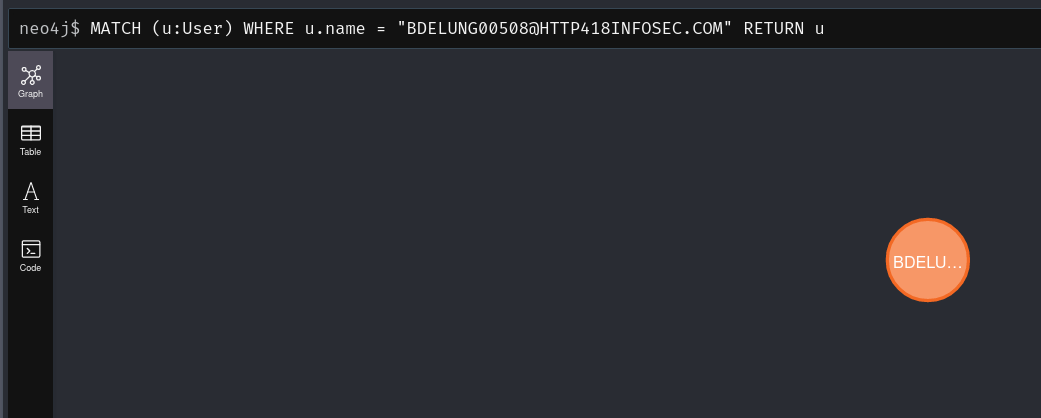
We can run a basic query to pull back a single user with the following query:
MATCH (u:User) WHERE u.name = "BDELUNG00508@HTTP418INFOSEC.COM" RETURN uWhilst this is quite simple, it does show that the syntax is very similar to SQL. If we look in the graph, Neo4j will return all the nodes which match this query. In this case it is just one account.
The u variable above will allow us to refer to all of the users impacted by the query above. For example, we can find all the users whose name begins with ‘BD’ using the query below. This will set u to represent all 5 users:
MATCH (u:User) WHERE u.name STARTS WITH "BD" RETURN u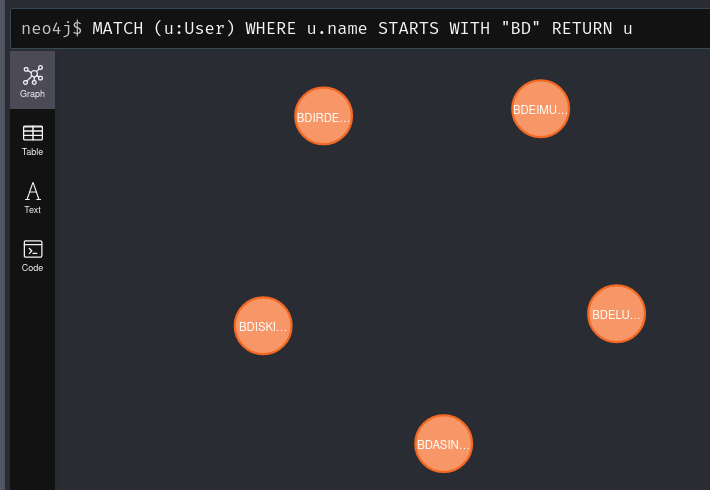
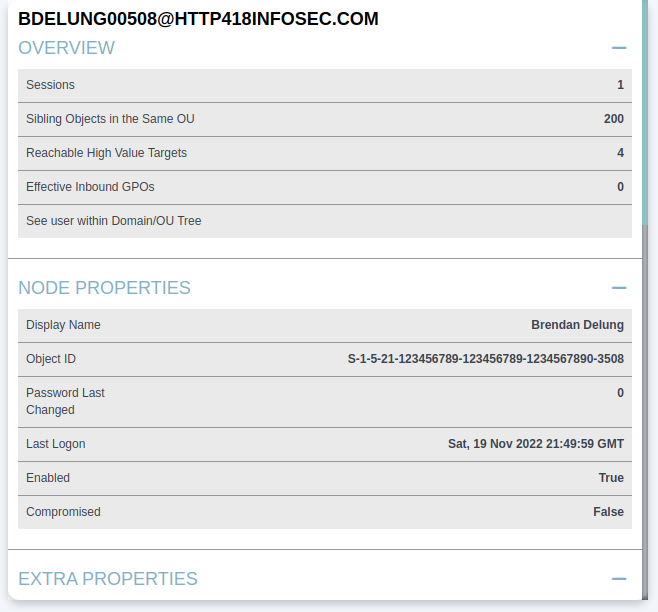
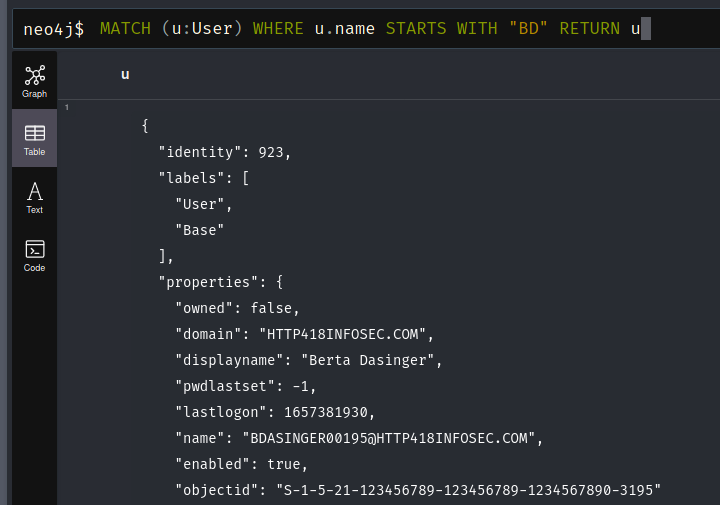
In order to return a single attribute from these users, we can change the value which we are returning. If we read the BloodHound documentation, there are a number of potential properties to return. We can also select the Table view to see all of the properties stored in the object:
We could then alter our query to just return the displayname field with the following query:
MATCH (u:User) WHERE u.name STARTS WITH "BD" RETURN u.displayname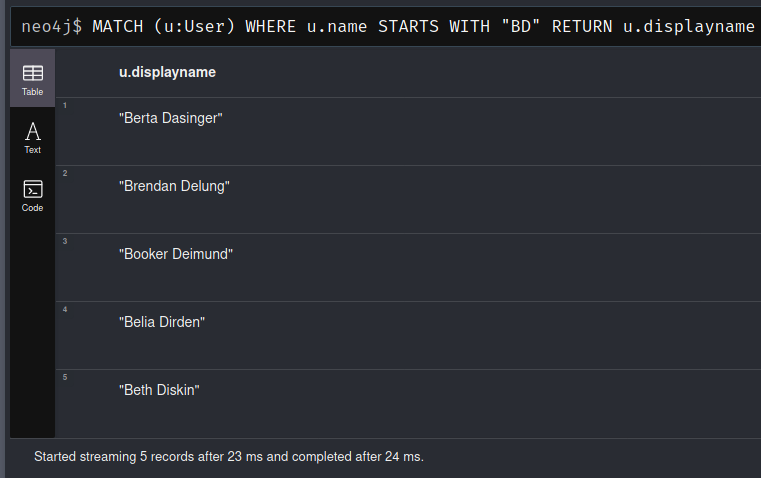
And we don’t have to just use Users, if we partially complete a query then Neo4j will suggest other types of we can use.
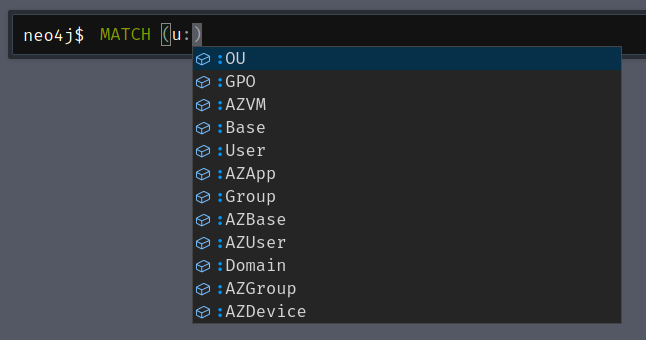
For example, we can return groups which begin with ‘IT’ by altering the query from MATCH (u:User) to MATCH (u:Group).
MATCH (u:Group) WHERE u.name STARTS WITH "IT" RETURN u.name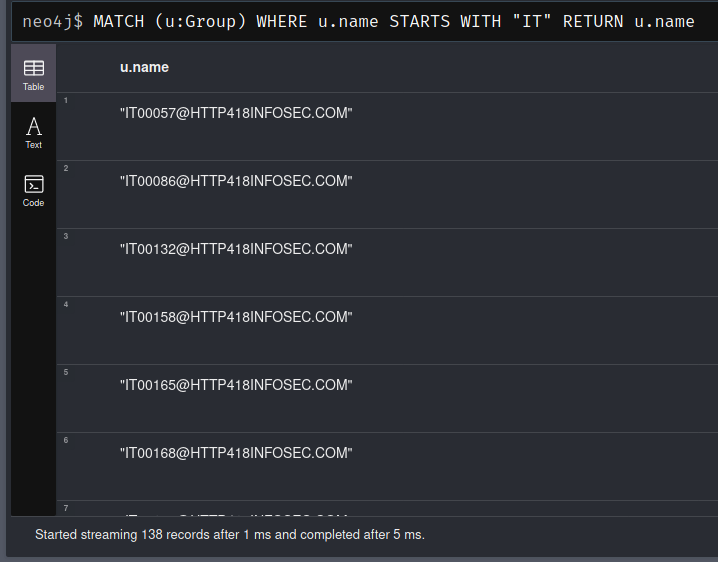
Analysing Relationships
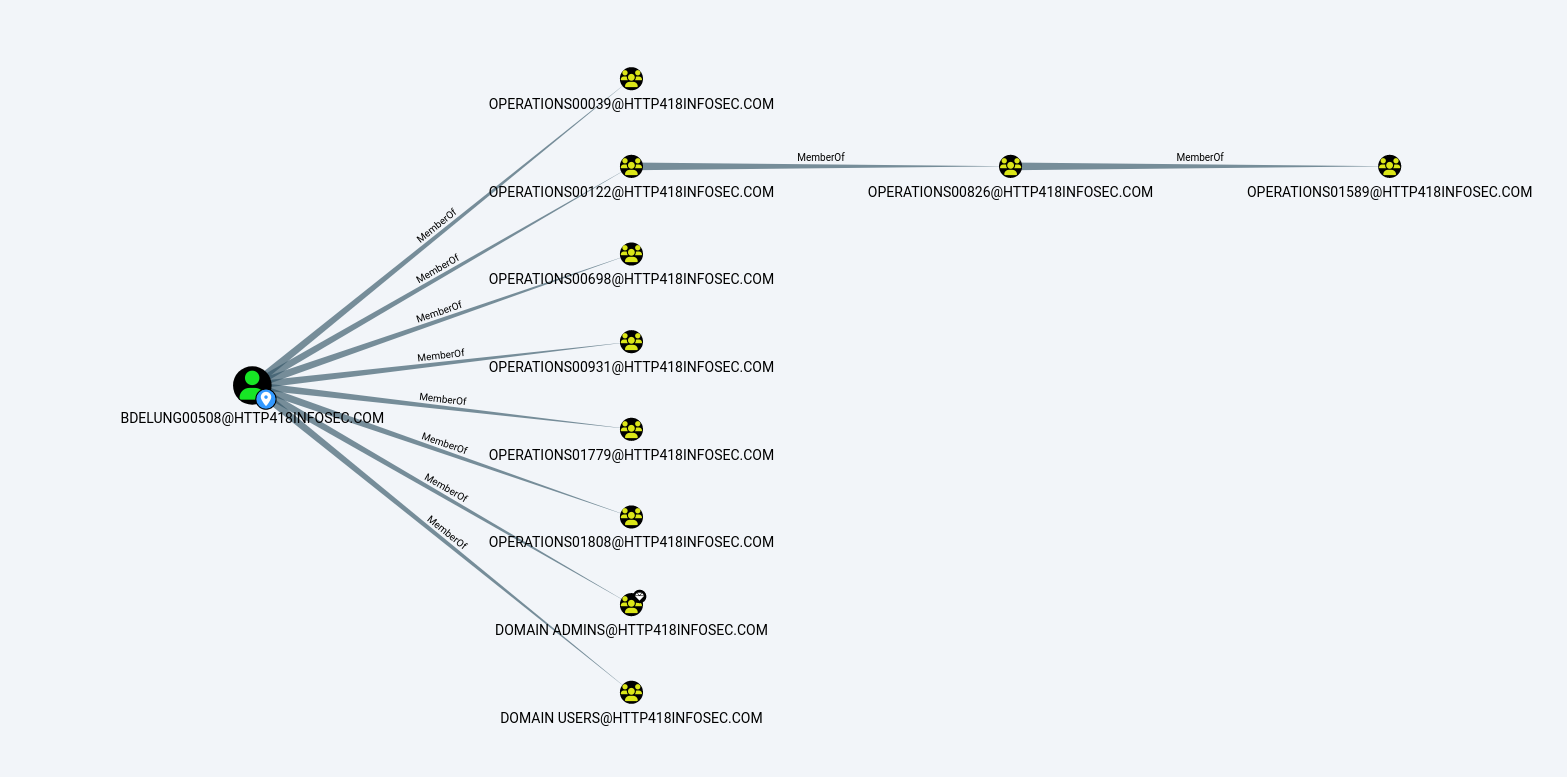
This is all well and good, but the power of Neo4j comes from being able to identify relationships between nodes. To do this, lets find all the groups which BDELUNG00508 is within. To do this, we will need to search for Users which are a member of a group. This is done by using the following syntax:
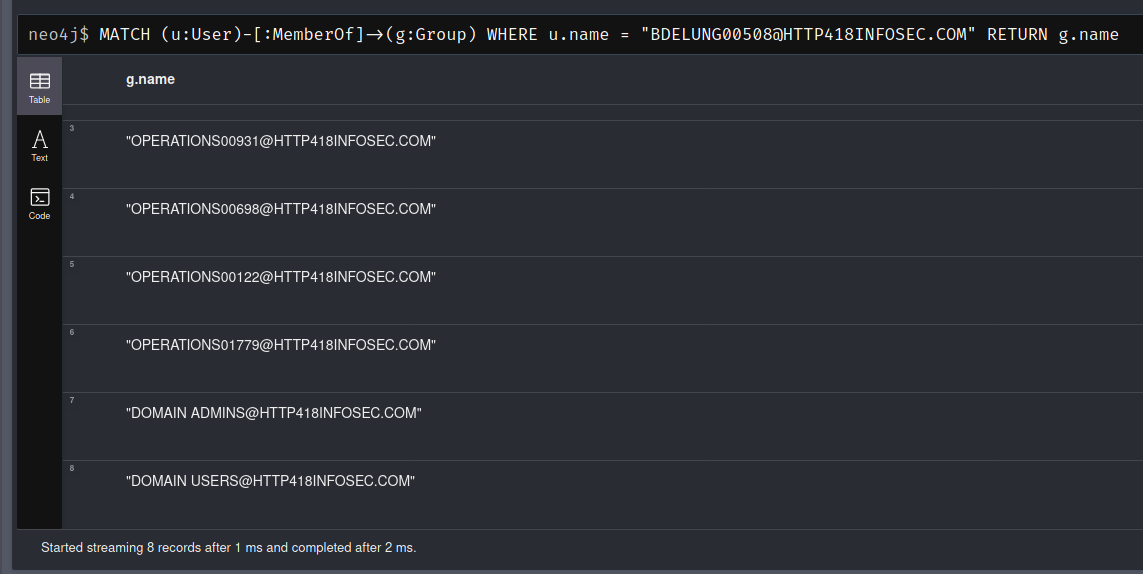
MATCH (u:User)-[:MemberOf]->(g:Group)This uses the ‘MemberOf’ edge in BloodHound to reveal users who are a member of a group. We will then need to filter this dataset down to only include the Brendan Delung user from our previous post, which we can do with the following command:
WHERE u.name = "BDELUNG00508@HTTP418INFOSEC.COM"And finally, return the group names with
RETURN g.name.Giving us a final command of:
MATCH (u:User)-[:MemberOf]->(g:Group)
WHERE u.name = "BDELUNG00508@HTTP418INFOSEC.COM"
RETURN g.name
This is the equivalent command to the one we used in our original post, which can be represented by the following graph:

We can do some further queries to manipulate the data, for instance, what if we only want to return the nested groups? To do this, we can use the *2.. Operator on the relationship section of the query to ensure that there are 2 consecutive MemberOf relationships. This will return the two groups on the right of the above image.
MATCH (u:User)-[:MemberOf*2..]->(g:Group)
WHERE u.name = "BDELUNG00508@HTTP418INFOSEC.COM"
RETURN g.name

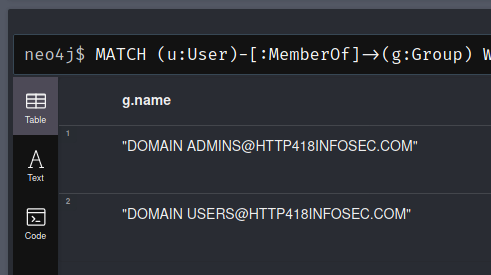
Or if we want to ignore any of the groups beginning with “Operations“, then we can use the NOT operator:
MATCH (u:User)-[:MemberOf]->(g:Group)
WHERE u.name = "BDELUNG00508@HTTP418INFOSEC.COM" AND NOT(g.name STARTS WITH "OPERATIONS")
RETURN g.name
Pathfinding
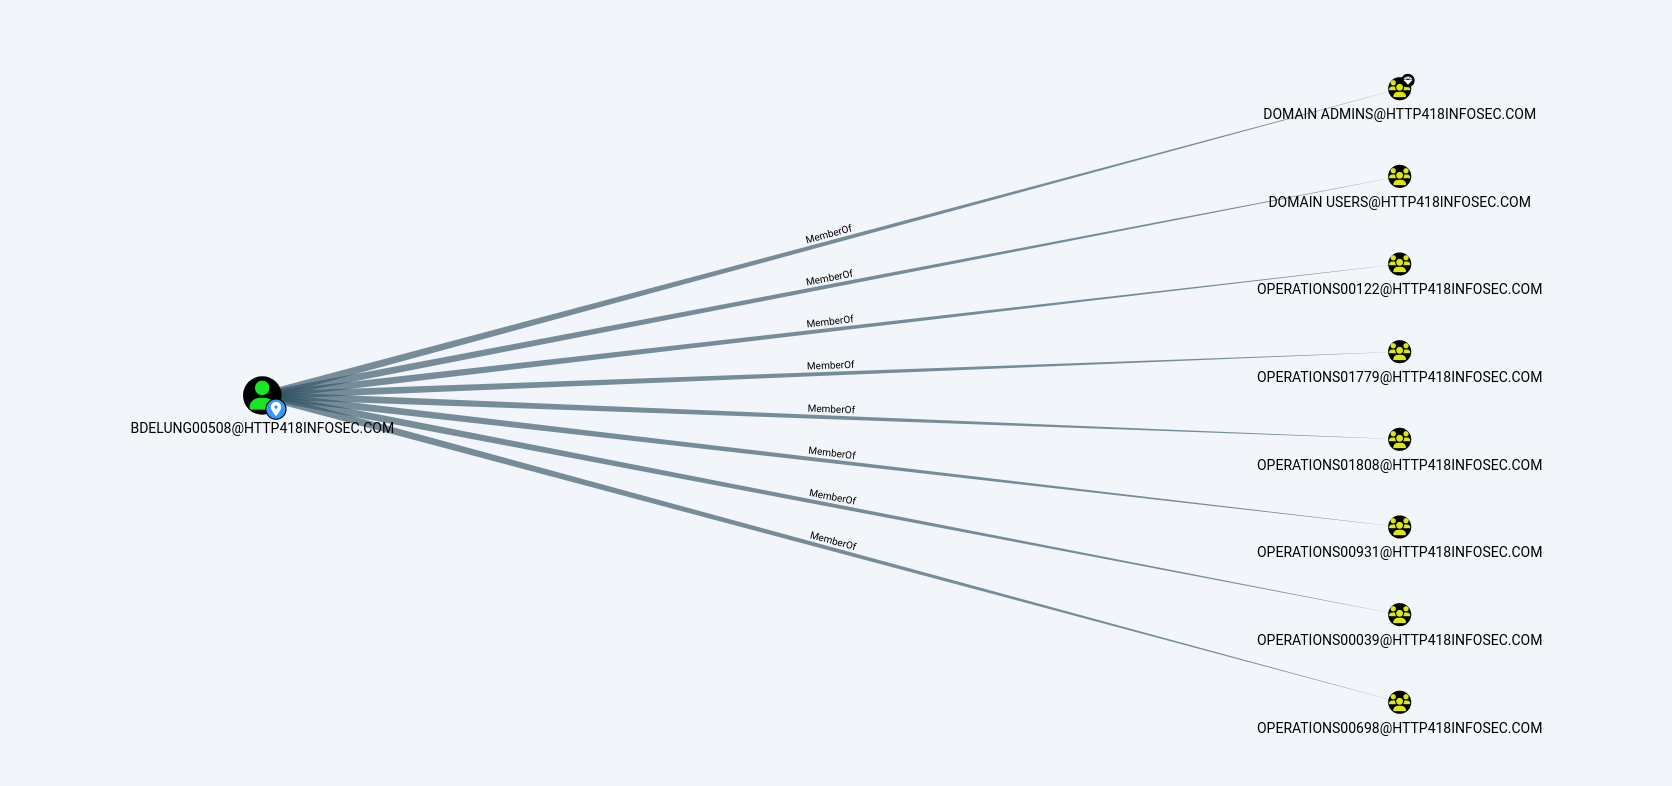
If we want to represent any of these as a ‘path’ rather than a table, we can use the p= operator. For example, if we want to view the previous query as a path we would add p= to the beginning of the query and return the p variable.
MATCH p=(u:User)-[:MemberOf]->(g:Group)
WHERE u.name = "BDELUNG00508@HTTP418INFOSEC.COM" AND NOT(g.name STARTS WITH "OPERATIONS")
RETURN p
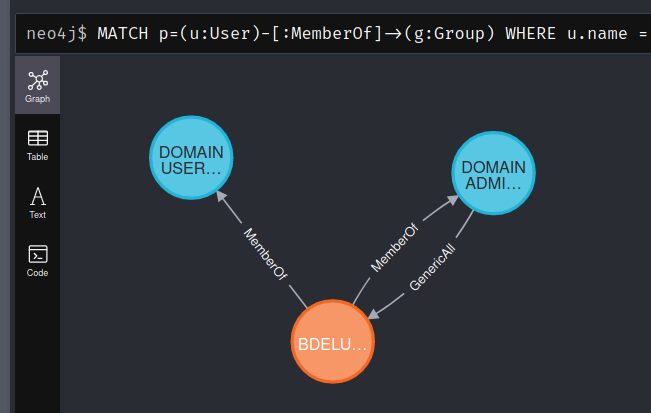
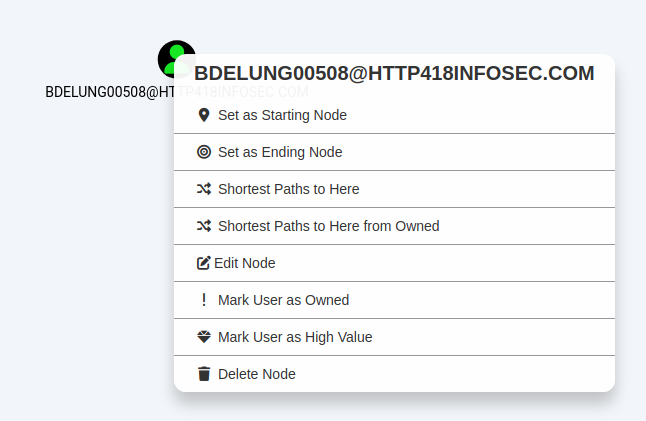
We can run this query in BloodHound using the ‘Raw Query‘ tab at the bottom of the screen. This allows us to interact with the results using the BloodHound GUI, rather than Neo4j. Below we can see the query above but within the GUI.

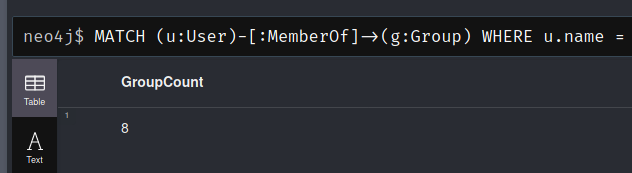
Finally, using one of the previous queries we can use the COUNT operator to count the amount of results returned. We will use this extensively later on. In this case, we will count the number of groups which BDELUNG00508 is explicitly added to, ignoring any nested groups.
MATCH (u:User)-[:MemberOf]->(g:Group)
WHERE u.name = "BDELUNG00508@HTTP418INFOSEC.COM"
RETURN COUNT(g) AS GroupCount
Assessing AD
Enough of the theory, lets start to combine some of these features together! In this section I will cover a range of queries which I have had success with previously. Most of these queries can be repurposed to cover whatever group of assets you are interested in. Common examples of groups might be:
- AD Administrators/privileged accounts
- Tier 0 or Tier 1 assets
- Privileged Software users
- ADCS
- ADFS
- SCCM
- AV/EDR
- Backup systems
- Exchange Admins
- Interesting user groups
- Developers
- SOC
- Cloud Admins
Find All Nested Users For A Specific Group
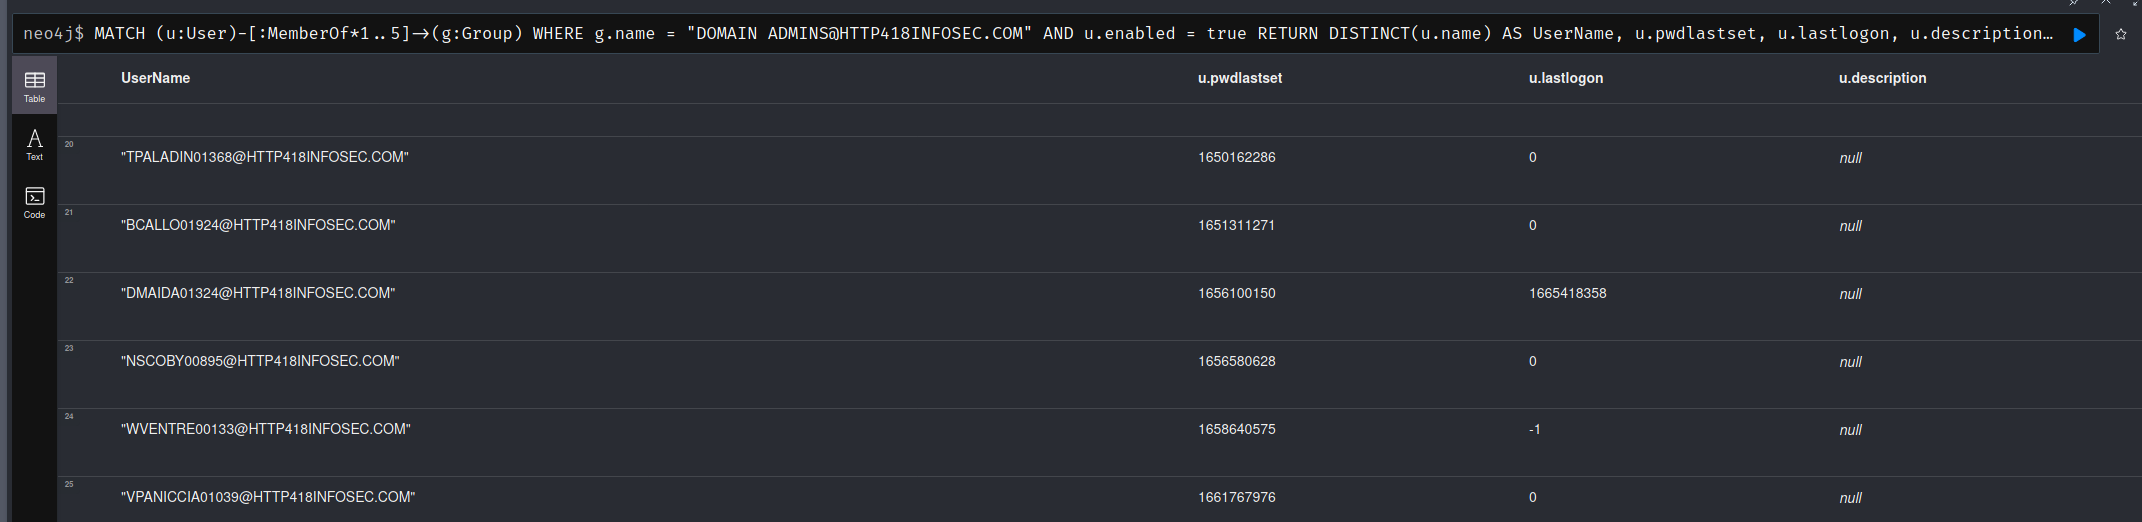
This is handy to find all of the users for a specific AD group. By analysing multiple nested groups, we can find users who have access to our chosen group, but we might not have been aware of. This is very similar to the query used above, except we are finding the users in a group, instead of the groups a user is in. Also we are using the DISTINCT function for the output, to prevent duplicate results.
In this query, several other parameters are also returned which can be handy for further analysis. For example pwdlastset can help us find accounts which have old passwords, or the description field can shed light as to why this user has access to this group. In this example I am using the Domain Admins group, but it works well against systems such as Exchange with groups such as Exchange Recipient Administrators.
The 1..5 operator should be modified depending on the complexity of the environment. I would recommending starting at 1..2 or 1..3 (i.e. A maximum of 2 or 3 nested groups), as this will get exponentially more complex, and can cause BloodHound to crash if you arent careful!
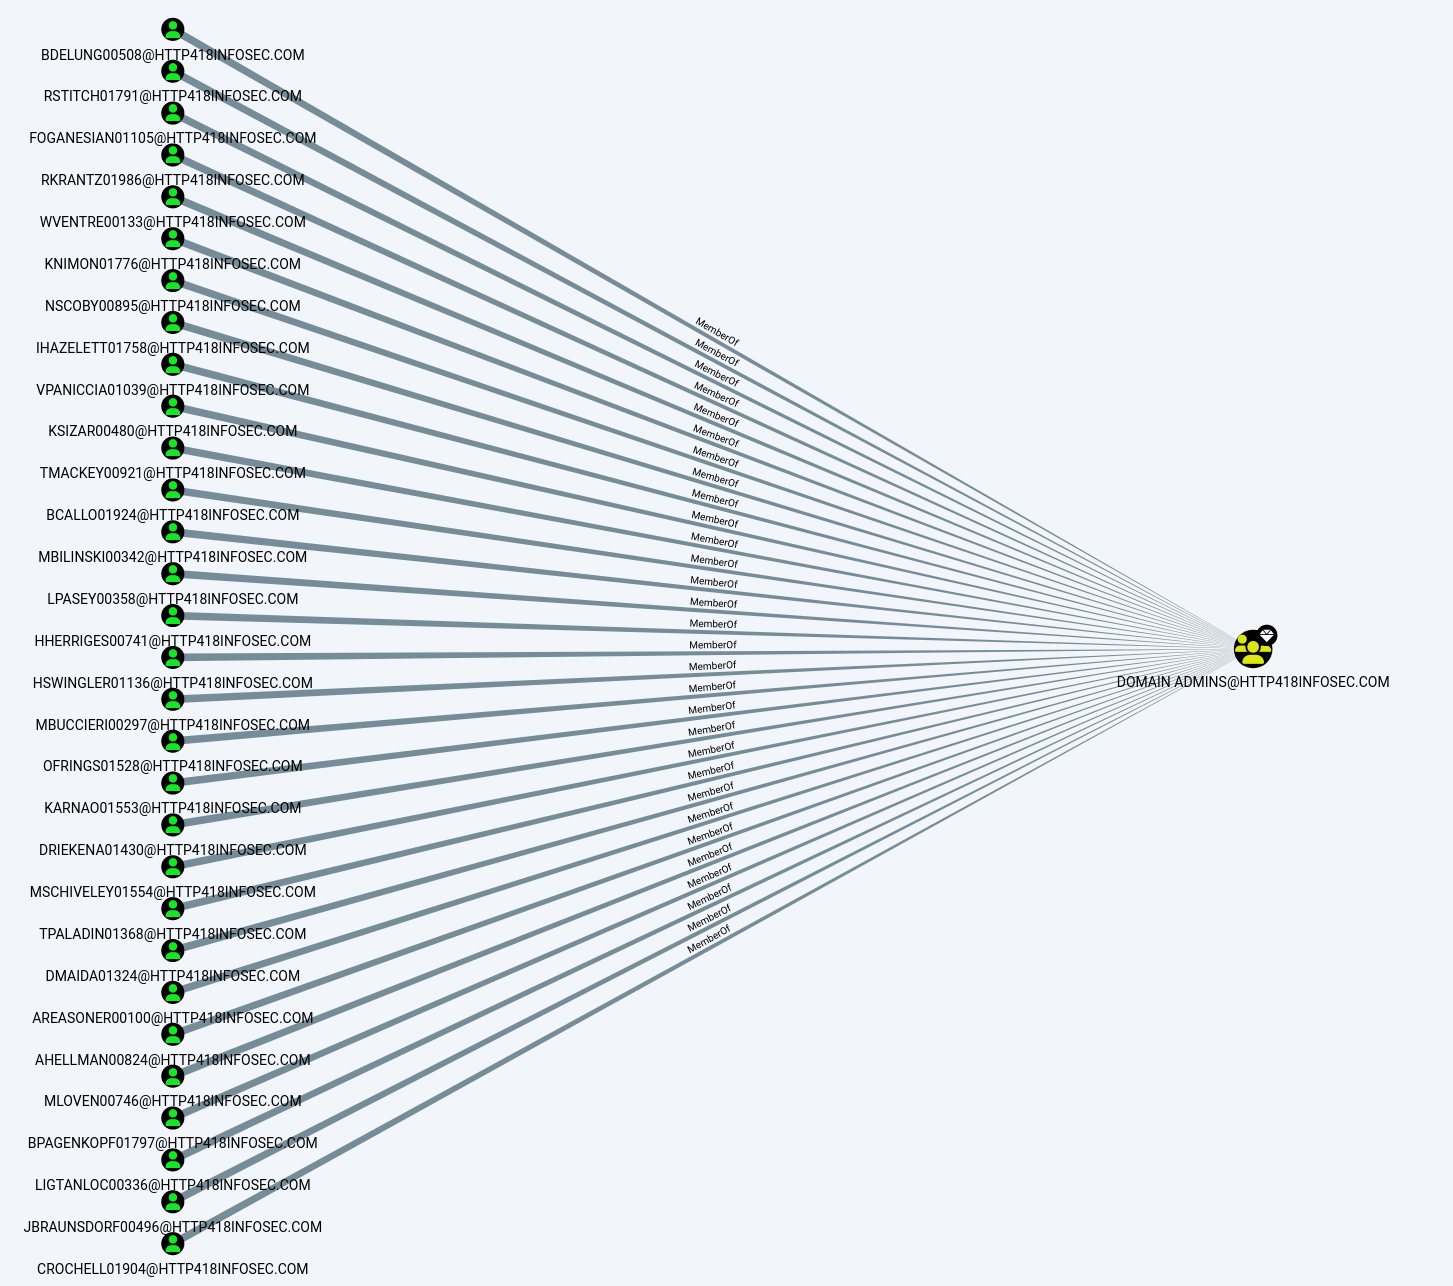
MATCH (u:User)-[:MemberOf*1..5]->(g:Group)
WHERE g.name = "DOMAIN ADMINS@HTTP418INFOSEC.COM" AND u.enabled = true
RETURN DISTINCT(u.name) AS UserName, u.pwdlastset, u.lastlogon, u.description
ORDER BY u.pwdlastset ASC
Find Exploitable Edges To A Wildcard Group Name
This allows us to find users who have an exploitable relationship with an object which is then a member of a group of interest. An exploitable relationship in this case would mean that further actions need to be taken before the user actually has access to the group. For example, it might have an AddMember permission over a group – so whilst they dont currently have access to the group, they could add themselves into it.
In the example below, we are looking for users who could grant themselves access to an AD object, which is then in turn a member of a group with ‘Exchange’ in its name (WHERE g.name =~ "(?i).*exchange.*").
This is handy to find users with dangerous misconfigurations which could lead to sensitive applications becoming compromised. This deliberately doesn’t include the MemberOf edge in the first section of the MATCH statement – as we are specifically looking for the more hidden misconfigurations.
MATCH (u:User)-[:AddMember|AddSelf|WriteSPN|AddKeyCredentialLink|AllExtendedRights|GenericAll|GenericWrite|WriteDacl|WriteOwner|Owns*1..4]->(o)-[:MemberOf]->(g:Group)
WHERE g.name =~ "(?i).*exchange.*"
RETURN DISTINCT(u.name), g.name
Find Users With Admin Access To Domain Controllers
For this query we specifically look for users with nested access to an object, which then has admin access onto computers within a group. This could be altered so that the group name is an Exchange Servers group, or DB servers etc.
MATCH (u:User)-[:AddMember|AddSelf|WriteSPN|AddKeyCredentialLink|AllExtendedRights|GenericAll|GenericWrite|WriteDacl|WriteOwner|Owns|MemberOf*1..4]->(o)-[:AdminTo]->(c:Computer)-[:MemberOf]->(g:Group)
WHERE g.name STARTS WITH "DOMAIN CONTROLLERS"
RETURN DISTINCT(u.name) AS UserName, o.name AS GrantingObjectName, c.name AS DCName
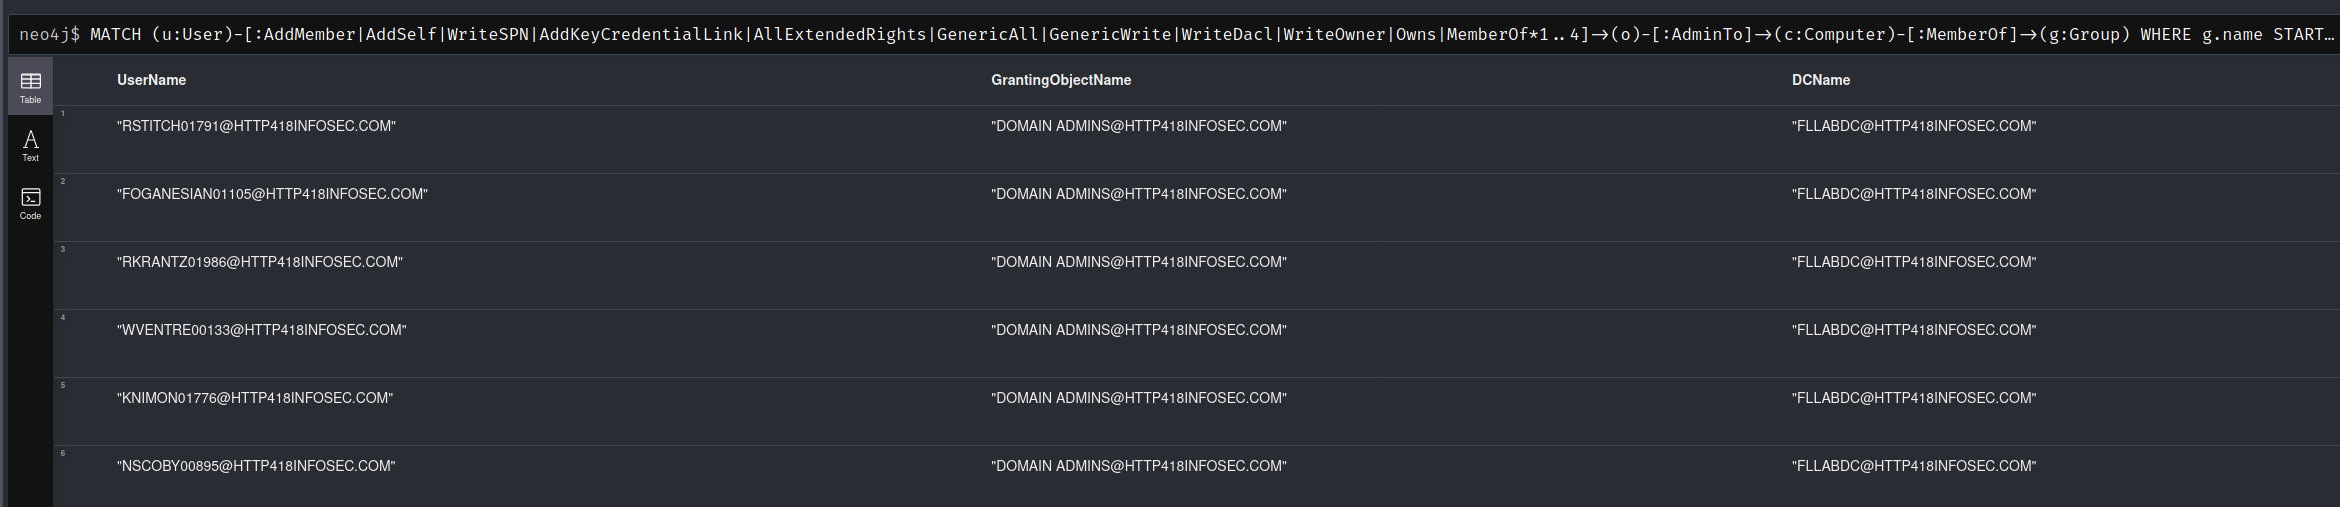
With this query, we can see a number of users go via the Domain Admins group to get access to the FLLABDC Domain Controller. All of the users in this query are actually legitimate domain admin users, so we could extend the query to ignore any users who go via the Domain Admins group (As Domain Admin users will have admin access to Domain Controllers)
MATCH (u:User)-[:AddMember|AddSelf|WriteSPN|AddKeyCredentialLink|AllExtendedRights|GenericAll|GenericWrite|WriteDacl|WriteOwner|Owns|MemberOf*1..4]->(o)-[:AdminTo]->(c:Computer)-[:MemberOf]->(g:Group)
WHERE g.name STARTS WITH "DOMAIN CONTROLLERS" AND NOT(o.name STARTS WITH "DOMAIN ADMIN")
RETURN DISTINCT(u.name) AS UserName, o.name AS GrantingObjectName, c.name AS DCName
Find All Active ‘Decommissioned’ Objects
Focusing on the auditing side of BloodHound, we can search for all objects which mention they are disabled or decommissioned, but are in fact still active. This is very much matter of Active Directory hygiene, and is less about finding a 1337 way of compromising a domain – but you never know!
MATCH (o)
WHERE o.enabled = true AND (o.description =~ "(?i).*disabled.*" OR o.description =~ "(?i).*decom.*")
RETURN o.name AS Name, o.description AS Description
This does rely on the description field containing either ‘disabled’ or ‘decom’, so it isn’t 100% accurate. You could also do a query to look at last login times and perform some sort of logic based on that.
Find The Most Dangerous ‘Decommissioned’ Objects
As a rough way of quantifying the most ‘dangerous’ decommissioned objects, we can perform a basic way of finding outbound access from any users we identified in the query above.
MATCH (o)-[:MemberOf*1..3]->(g:Group)-[r]->(n)
WHERE o.enabled = true AND (o.description =~ "(?i).*disabled.*" OR o.description =~ "(?i).*decom.*") AND r.isacl = true
RETURN o.name AS Name, o.description AS Description, COUNT(DISTINCT(n)) AS OutboundAccess
ORDER BY OutboundAccess DESC
This will look for any groups which our ‘decommissioned’ objects are within, then find the number of objects which those groups can access. We could alter this to look for groups which grant local admin rights, or look for exploitable AD permissions (i.e. GenericAll, WriteDacl etc) rather than nested group membership (i.e. -[:MemberOf*1..3]-> )
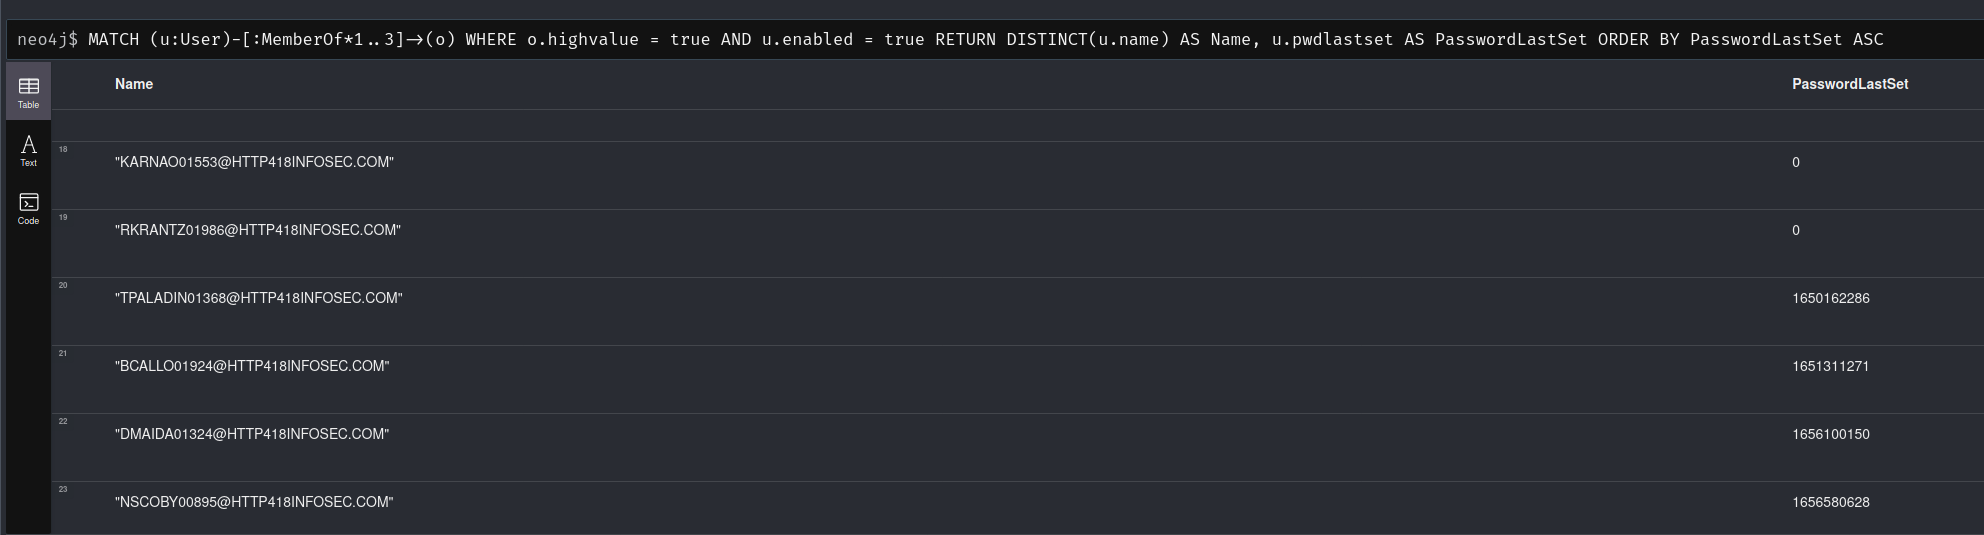
Finding Legacy Privileged Accounts
We can leverage the highvalue attribute within BloodHound to find users of interest, and then use the pwdlastset attribute to find accounts with older passwords, which might not be subject to more modern password requirements and could well be very weak.
MATCH (u:User)-[:MemberOf*1..3]->(o)
WHERE o.highvalue = true AND u.enabled = true
RETURN DISTINCT(u.name) AS Name, u.pwdlastset AS PasswordLastSet
ORDER BY PasswordLastSet ASC
We could also modify this to find users who mistakenly have access to high value targets. If we assume that an internal naming scheme of T0_ is used for all Tier 0 accounts, we could ignore them in our query to find all users who arent Tier 0. For example:
MATCH (u:User)-[:MemberOf*1..3]->(o)
WHERE o.highvalue = true AND u.enabled = true AND NOT(u.name STARTS WITH "T0_")
RETURN DISTINCT(u.name) AS Name
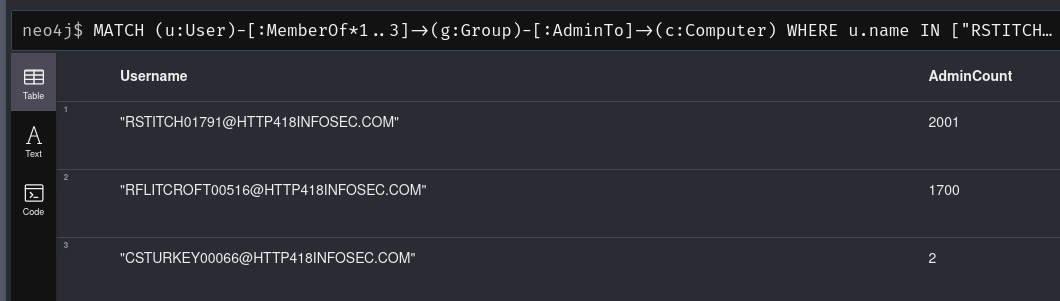
Evaluate Local Admin For A List Of Users
If you have a list of users of interest, you might want to evaluate how much onward administrative access they have. For example, users with weak passwords or legacy accounts which are due to be decommissioned. The query below is a basic way of performing this query.
MATCH (u:User)-[:MemberOf*1..3]->(g:Group)-[:AdminTo]->(c:Computer)
WHERE u.name IN ["RSTITCH01791@HTTP418INFOSEC.COM", "CSTURKEY00066@HTTP418INFOSEC.COM", "RFLITCROFT00516@HTTP418INFOSEC.COM"]
RETURN u.name AS Username, COUNT(DISTINCT(c)) AS AdminCount
ORDER BY AdminCount DESC
Which returns the number of systems which each user has local admin access to, showing that RSTITCH01791 is extremely powerful.
Evaluate Devices Which Allow Unconstrained Delegation
Unconstrained Delegation is a very dangerous attack primitive which can allow for a range of attacks. Therefore, it is essential that any devices which allow this attack are known about (and ideally removed!)
We can find devices which support it via the unconstraineddelegation attribute. For example, the query below will find users who are in nested groups, which have local admin access to a device which supports unconstrained delegation.
MATCH (u:User)-[:MemberOf*1..3]->(g:Group)-[:AdminTo]->(c:Computer)
WHERE c.unconstraineddelegation = true AND c.enabled = true AND u.enabled = true
RETURN c.name AS ComputerName, COUNT(DISTINCT(u)) AS AdminCount
ORDER BY AdminCount DESC
This could be extended to include any exploitable AD permissions (i.e. GenericAll, WriteDacl etc) rather than just group membership, but for now we can get a sense of how many users in our organisation have access:
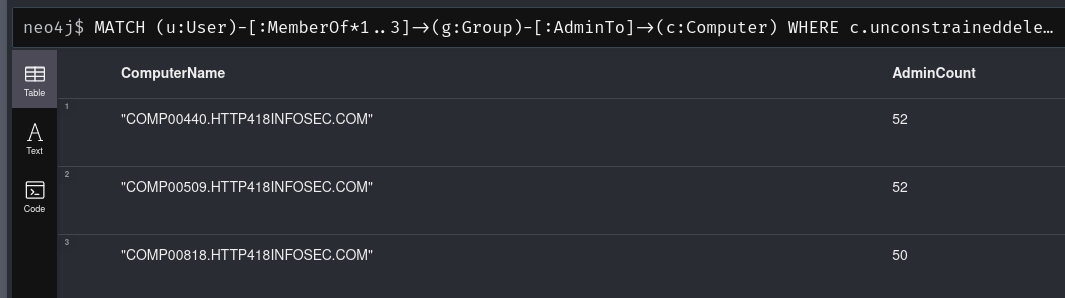
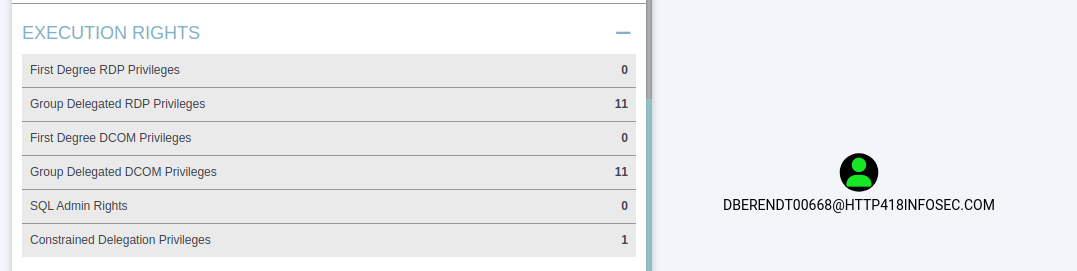
This is the same data as from the Unrolled Admins view on an individual asset – except we can now find this value for every vulnerable device in the BloodHound dataset!

Finding Shortest Path To Unconstrained Delegation
Given our data above, we could simply begin remediation from the devices with the most admins to the least. Whilst this would be a valid way of evaluating the data, we should also consider other factors – such as how easy is it to gain admin access? For example, if one of the admins is kerberoastable then we are in big trouble!
We can check this with the following query:
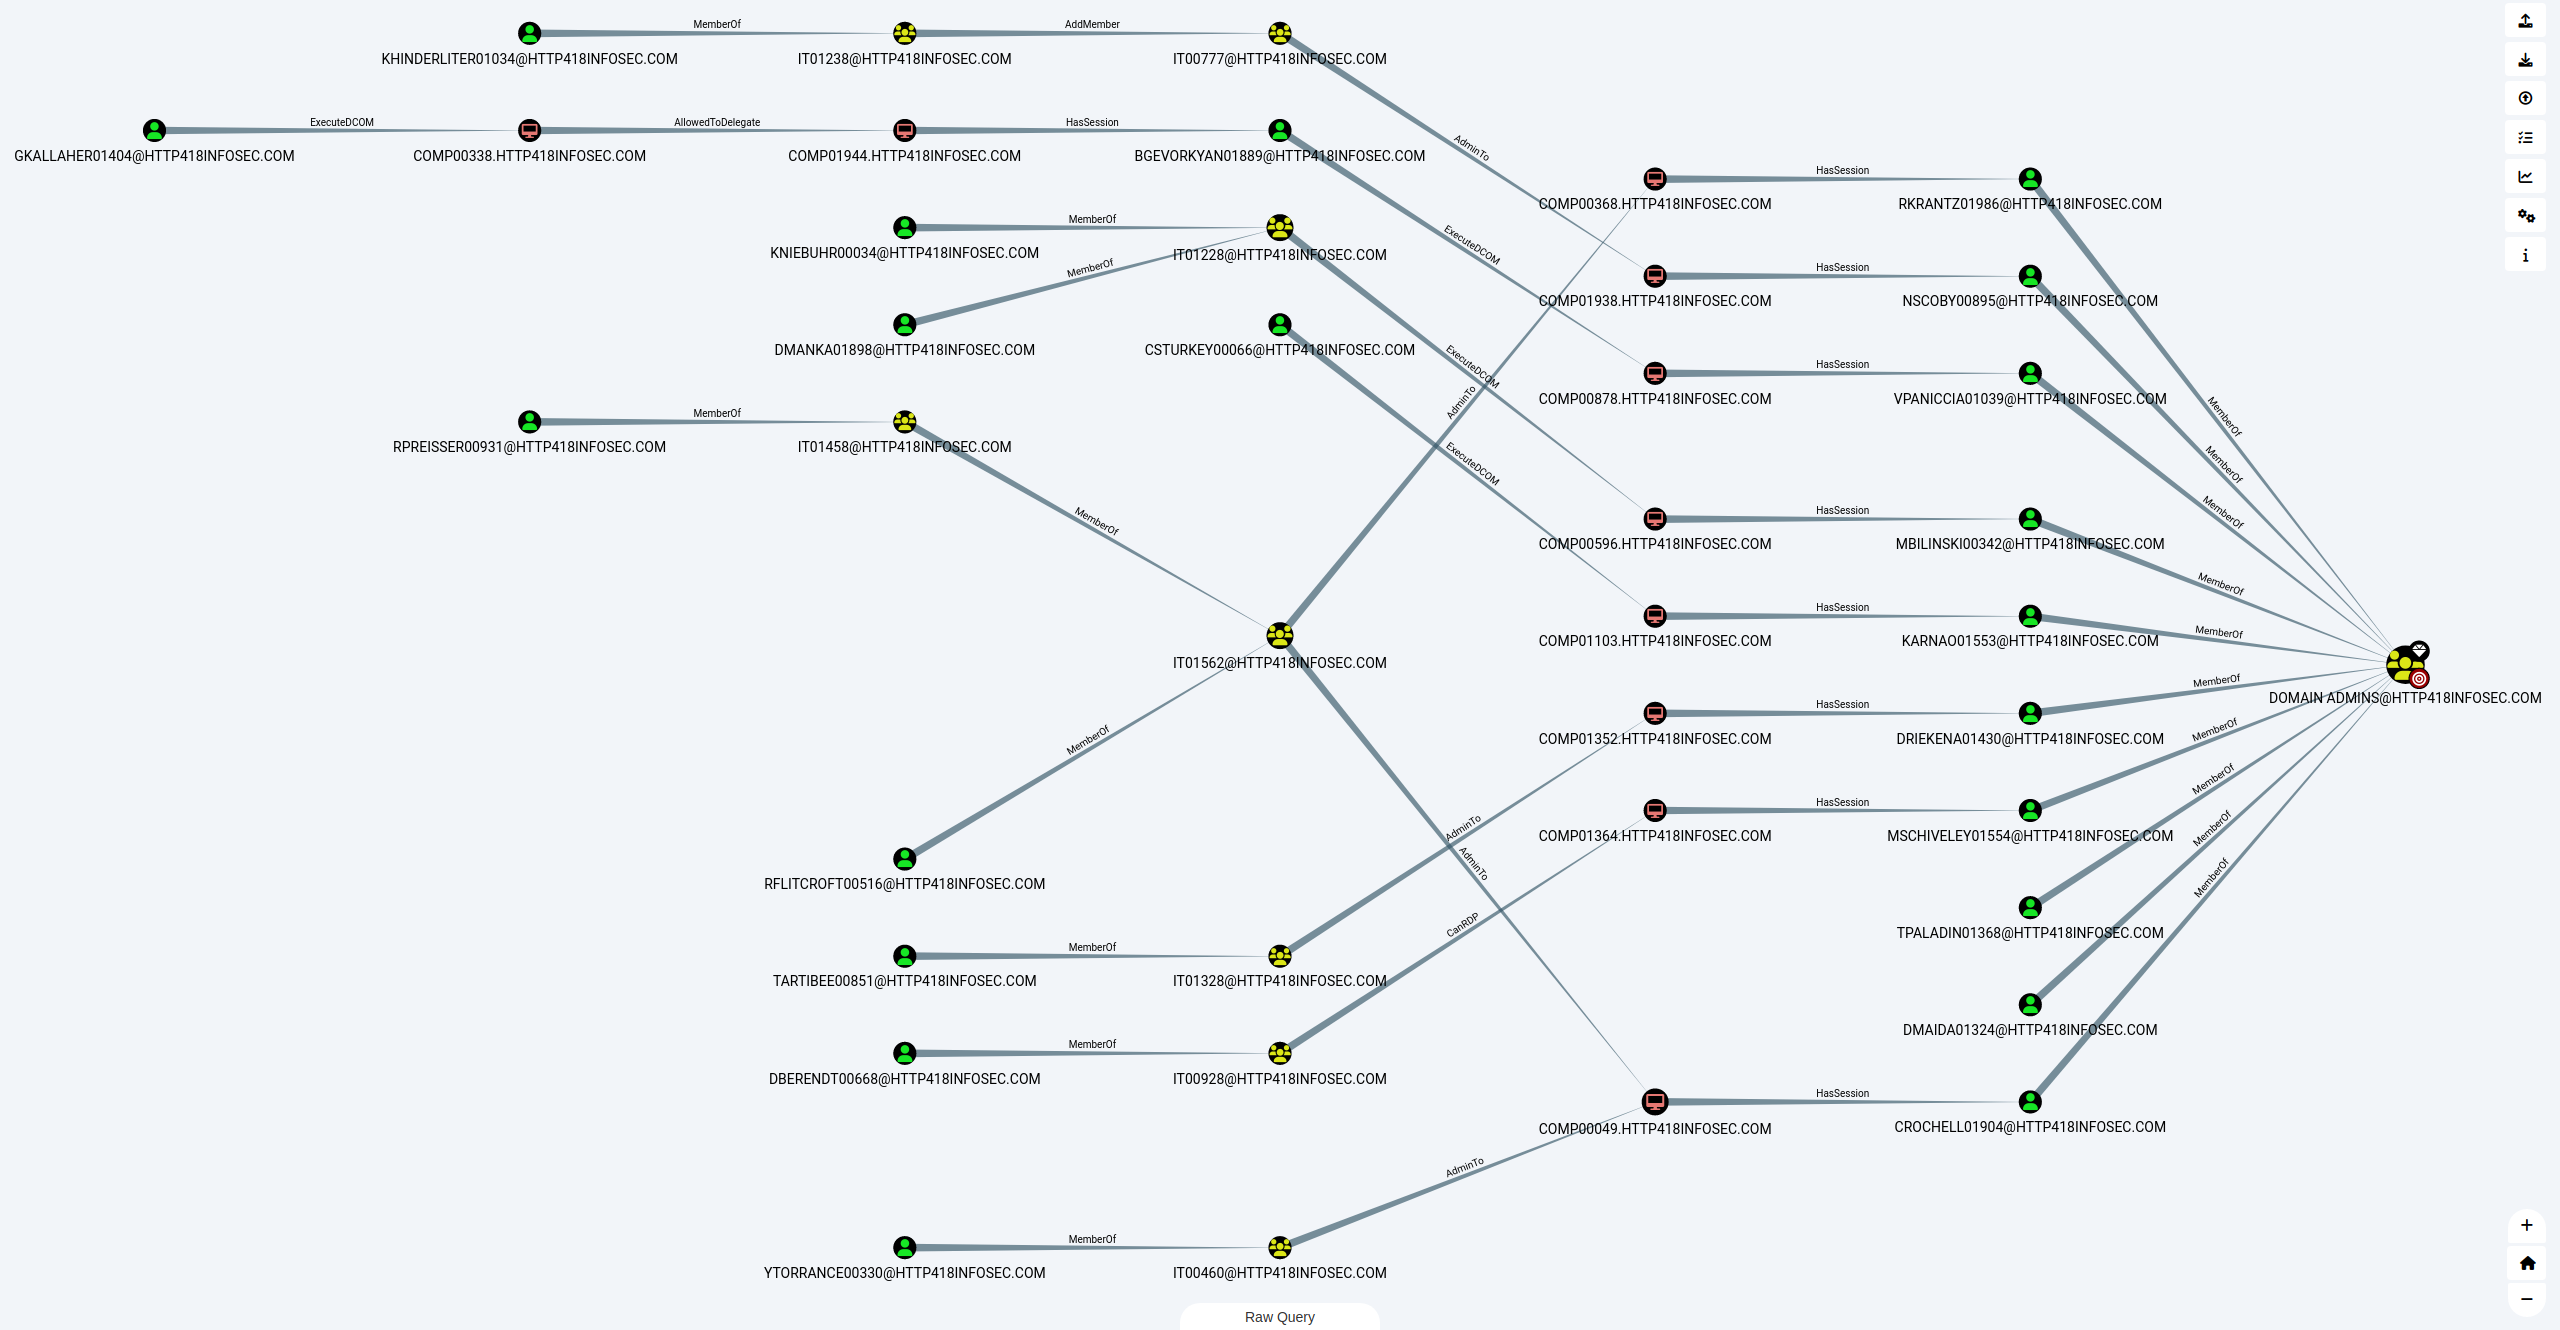
MATCH p=shortestpath((u:User)-[*1..]->(c:Computer))
WHERE c.unconstraineddelegation = true AND c.enabled = true AND u.enabled = true AND u.hasspn = true
RETURN p
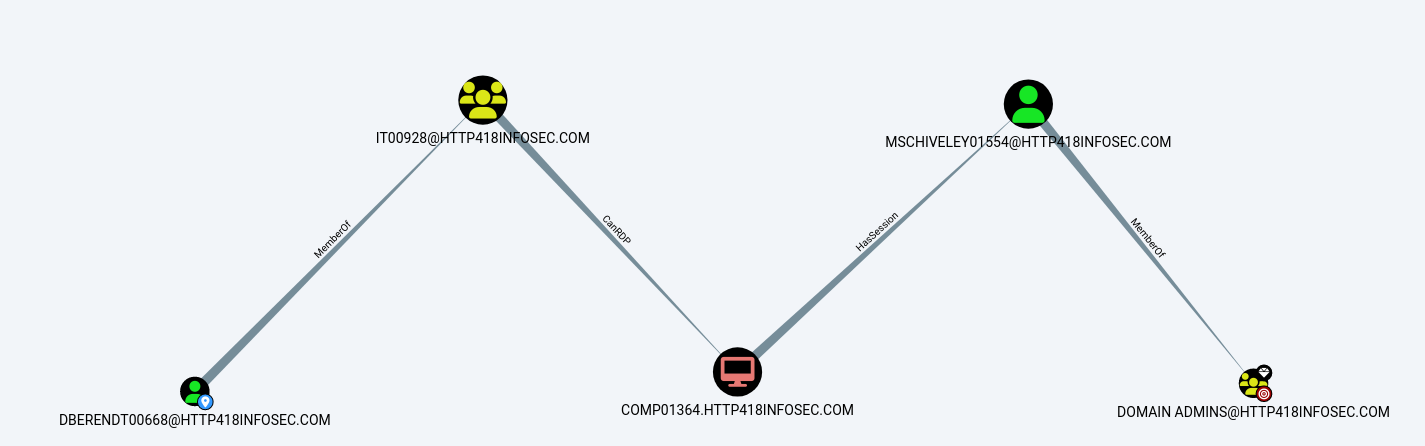
Which we will run in BloodHound’s GUI:
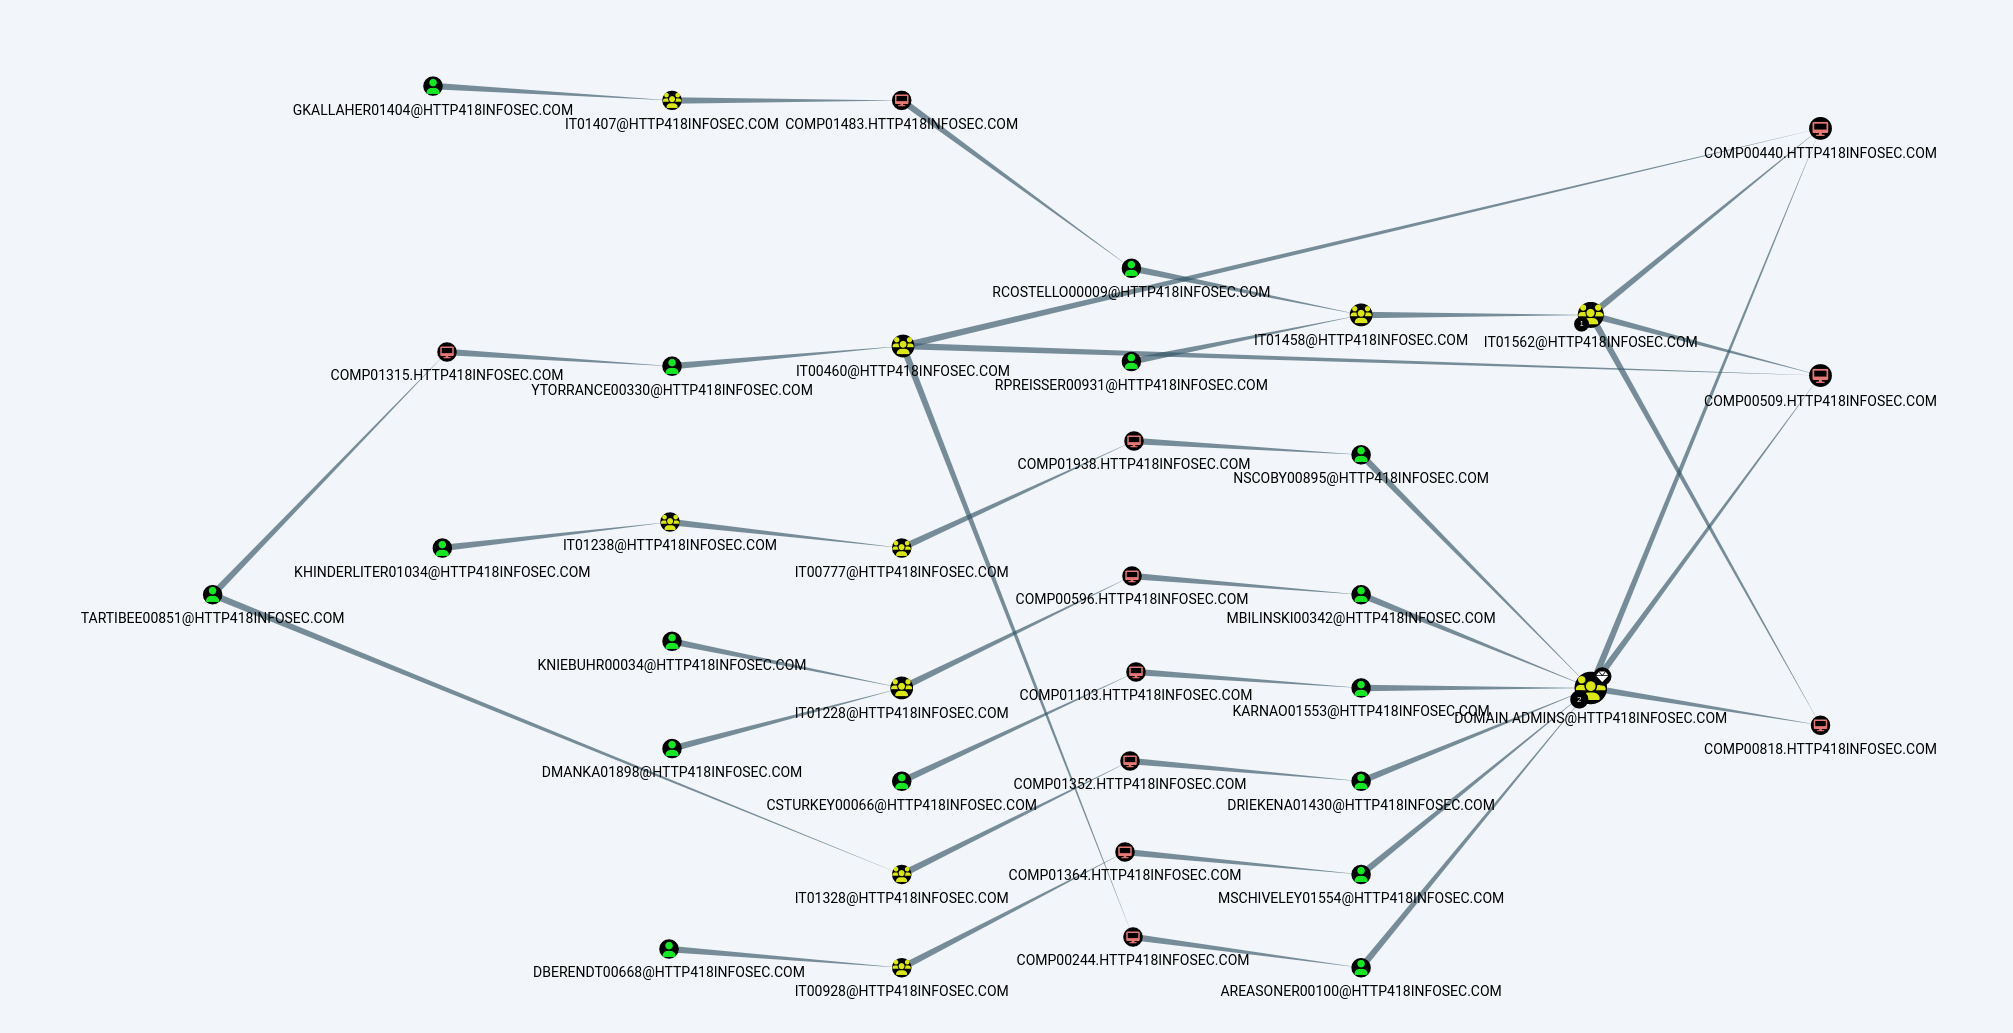
Now we can see that there are a range of kerberoastable users who eventually have access to systems which support unconstrained delegation – including routes via the Domain Admins group!
Summary
In summary, BloodHound is an extremely flexible way of evaluating an AD environment. The ‘standard’ version is excellent at allowing this point-in-time evaluation, with BloodHound Enterprise being far better suited to continuous evaluation.
There are an enormous amount of BloodHound queries both within the tool, and on GitHub which will show even more ways in which Cypher can be used and are a great way of understanding the Cypher language!