Over the past months and years at $dayjob, I have done a lot of work with BloodHound to remove attack paths and improve the attack surface of our Active Directory environment. During this time I have found a number of ways to leverage BloodHound to perform what is effectively an audit of Active Directory, by identifying key attack paths and quantifying issues within large enterprise environments.
Initially, I found the more advanced query language (Cypher) to be quite complex, but it is very powerful and just happens to use a slightly different structure to other languages such as SQL.
To start, Ill generate a BloodHound dataset using the DBCreator script provided by SpecterOps. Following that, I will cover what Cypher is and explain some of its features in a later post. Finally, I will share some queries which can help to audit your environment.
For this guide, I wont cover what BloodHound is or the very basics of the program. There are other guides which already exist which do a great job of this, and the documentation is very thorough.
Environment Prep
Lets use the DBCreator script, but we will use byt3bl33d3r’s PR to fix some of the issues in the original version. This section does get a bit techy, so skip over the install section if you just want to learn about BloodHound!
I had a lot of issues getting this to work, so I simplified the usage of pickle in the MainMenu class. By changing the assignment to first_names and last_names to something simpler:
first_pickle = open("data/first.pkl",'rb')
last_pickle = open("data/last.pkl",'rb')

self.first_names = pickle.load(first_pickle)
self.last_names = pickle.load(last_pickle)

cmd.Cmd.__init__(self)
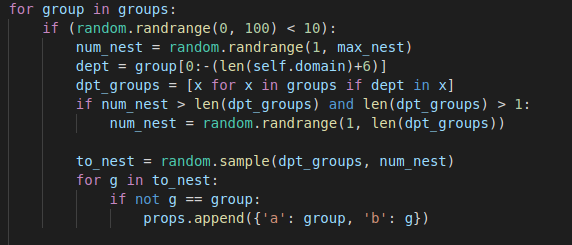
I also found the environment variables didn’t work, so I opted to clear them, and finally the group nesting function uses a hardcoded value (dept = group[0:-19]) for the length of the default ‘TESTLAB.LOCAL‘ domain name. I changed this to the value of self.domain + 6 to return the correct value & work as expected.
dept = group[0:-(len(self.domain)+6)]
The final group nesting logic is:
I will make a PR for this if I get around to it one day!
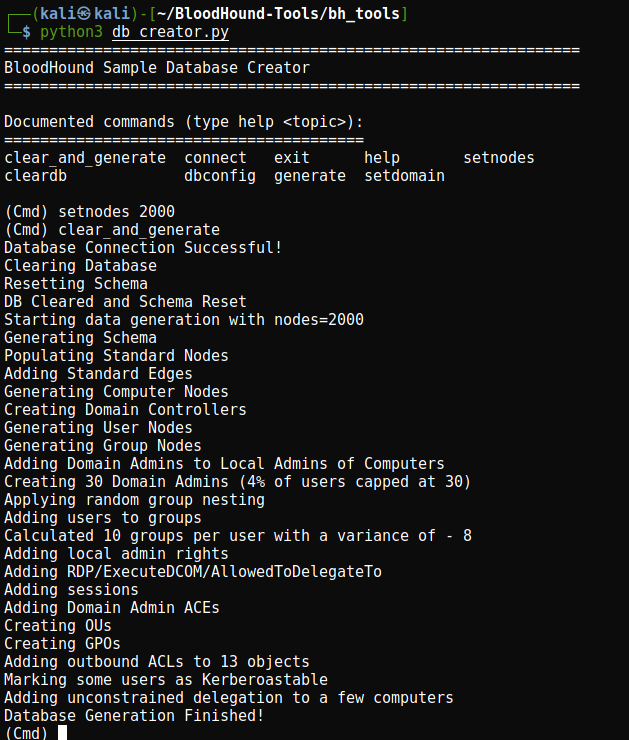
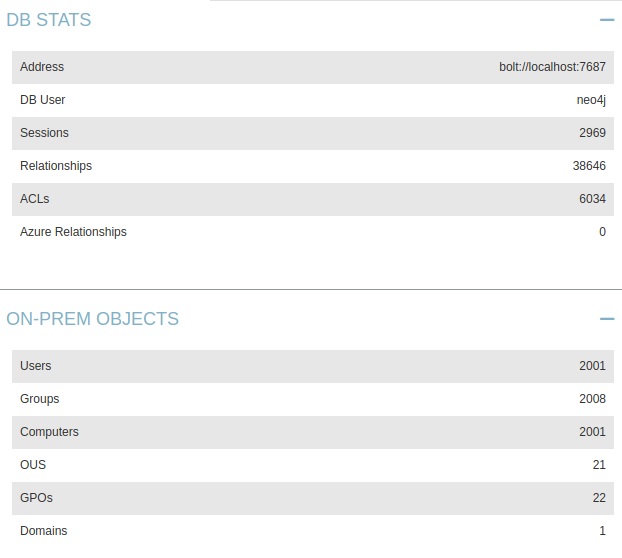
And lets load up BloodHound to verify it worked correctly:
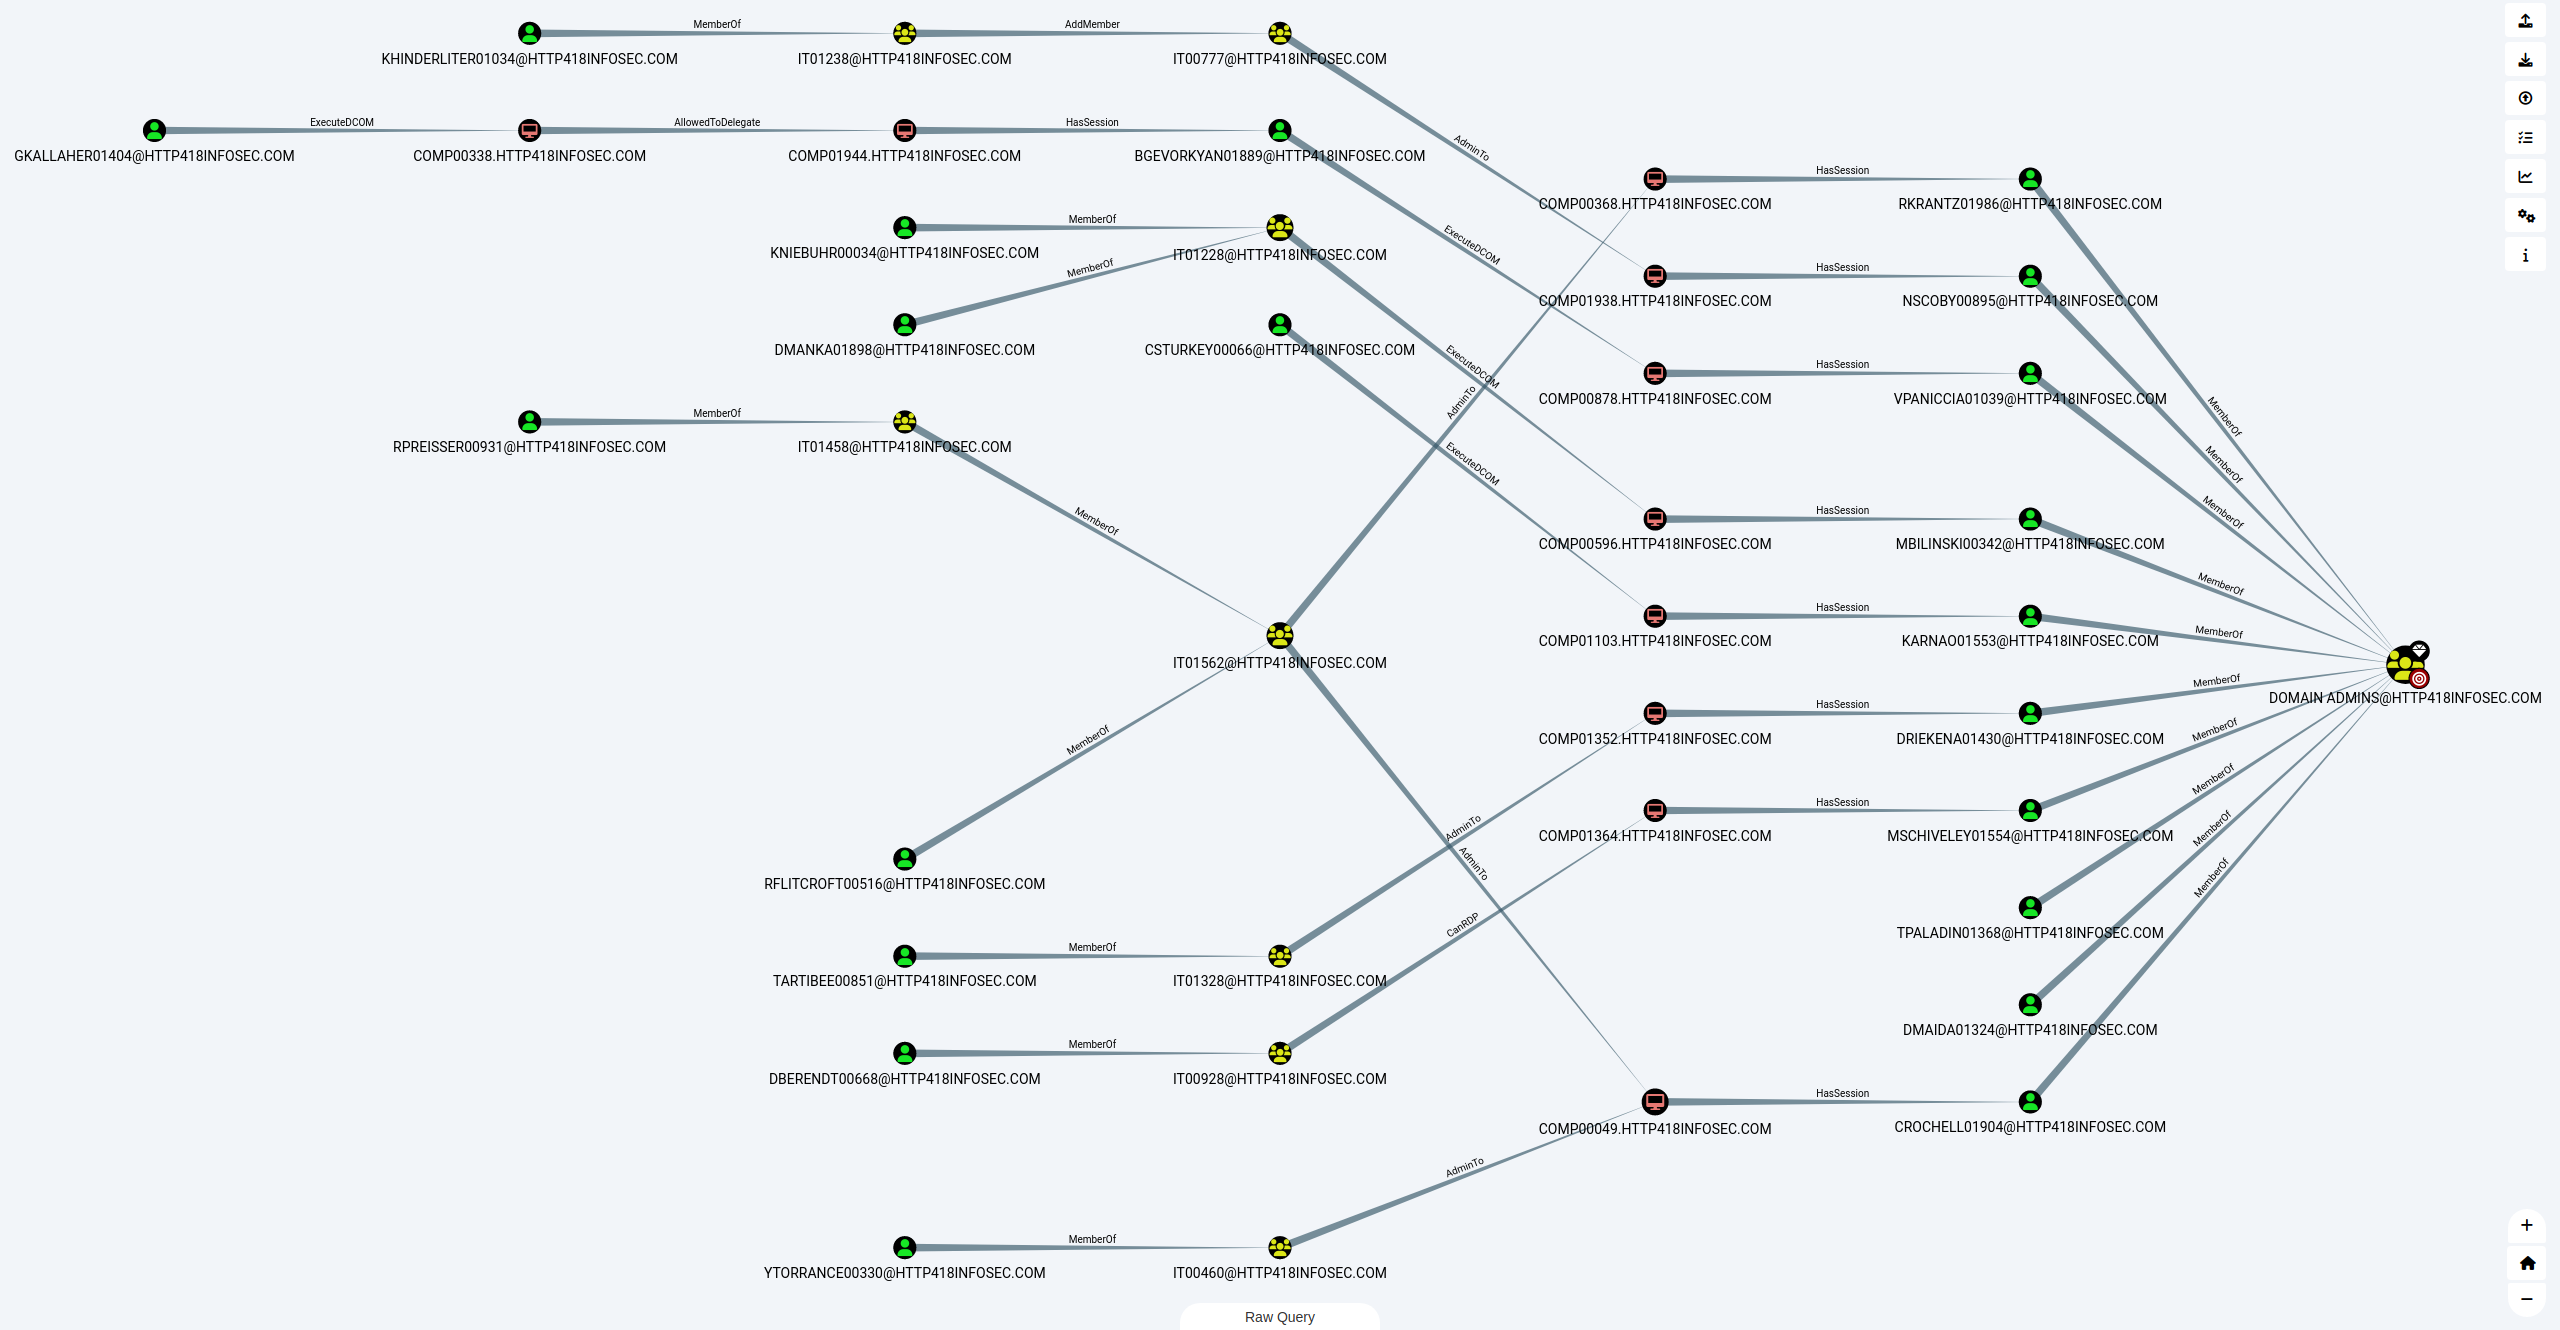
And we get a pretty neat graph out of it when we run one of the pre-built queries – but more on this later on!
Basic Analysis
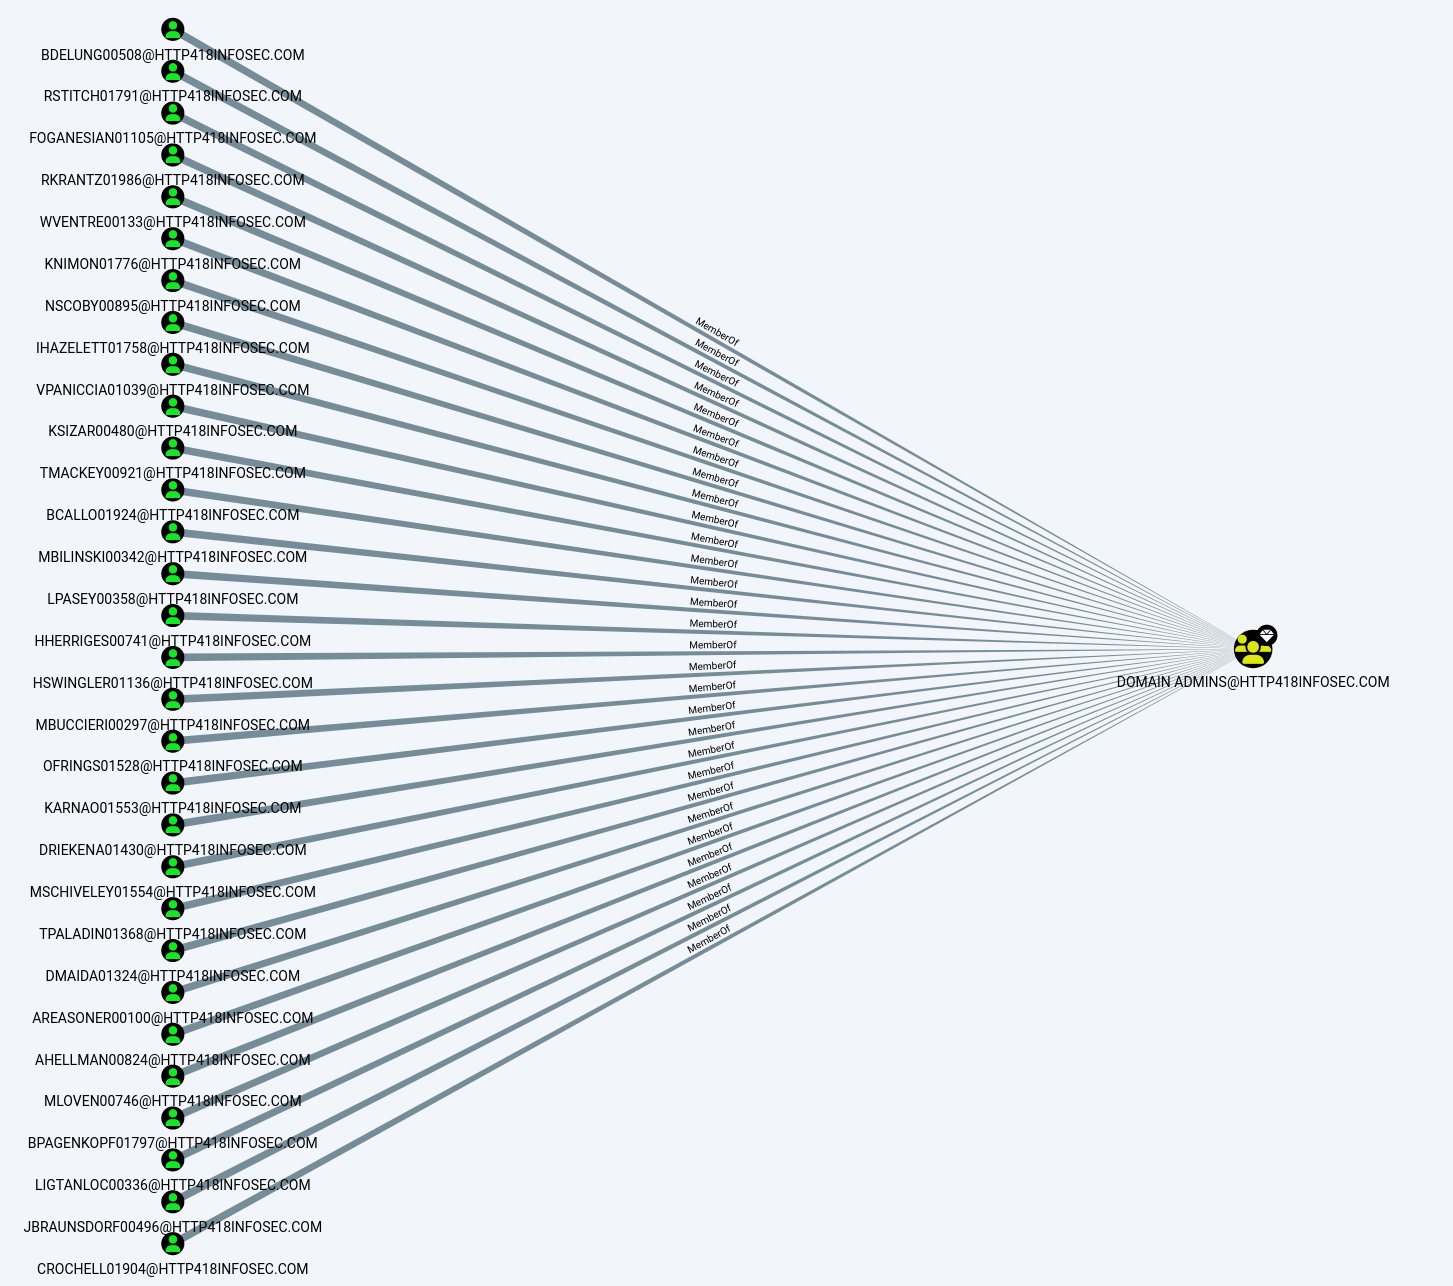
When we have our data loaded into BloodHound, we are presented with a view which shows all of the Domain Admins in the data we gathered. In my example, there are a lot of Domain Admins, so the graph is quite large!
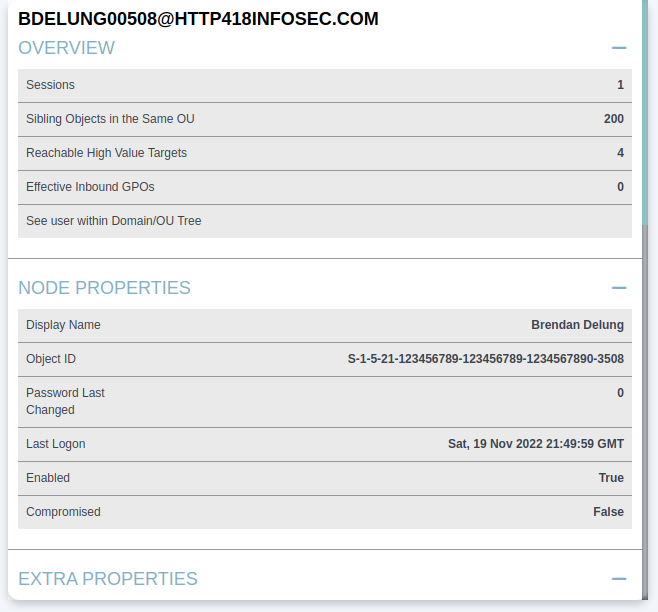
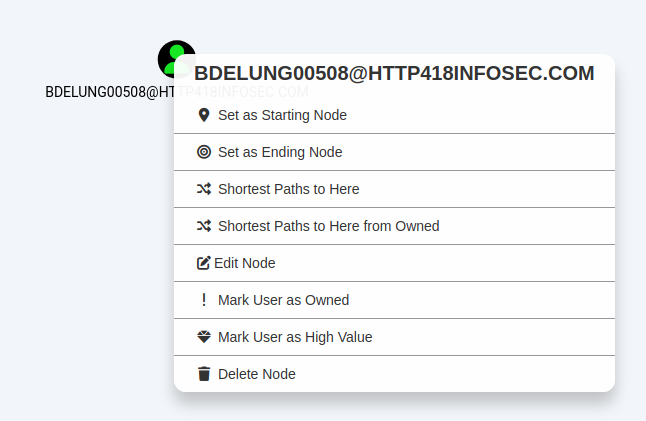
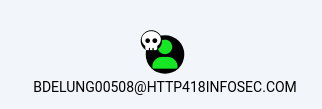
We can click on any of these users to load details on that specific user. For example we can see that BDELUNG00508@HTTP418INFOSEC.COM is the account for Mr Brendan Delung.
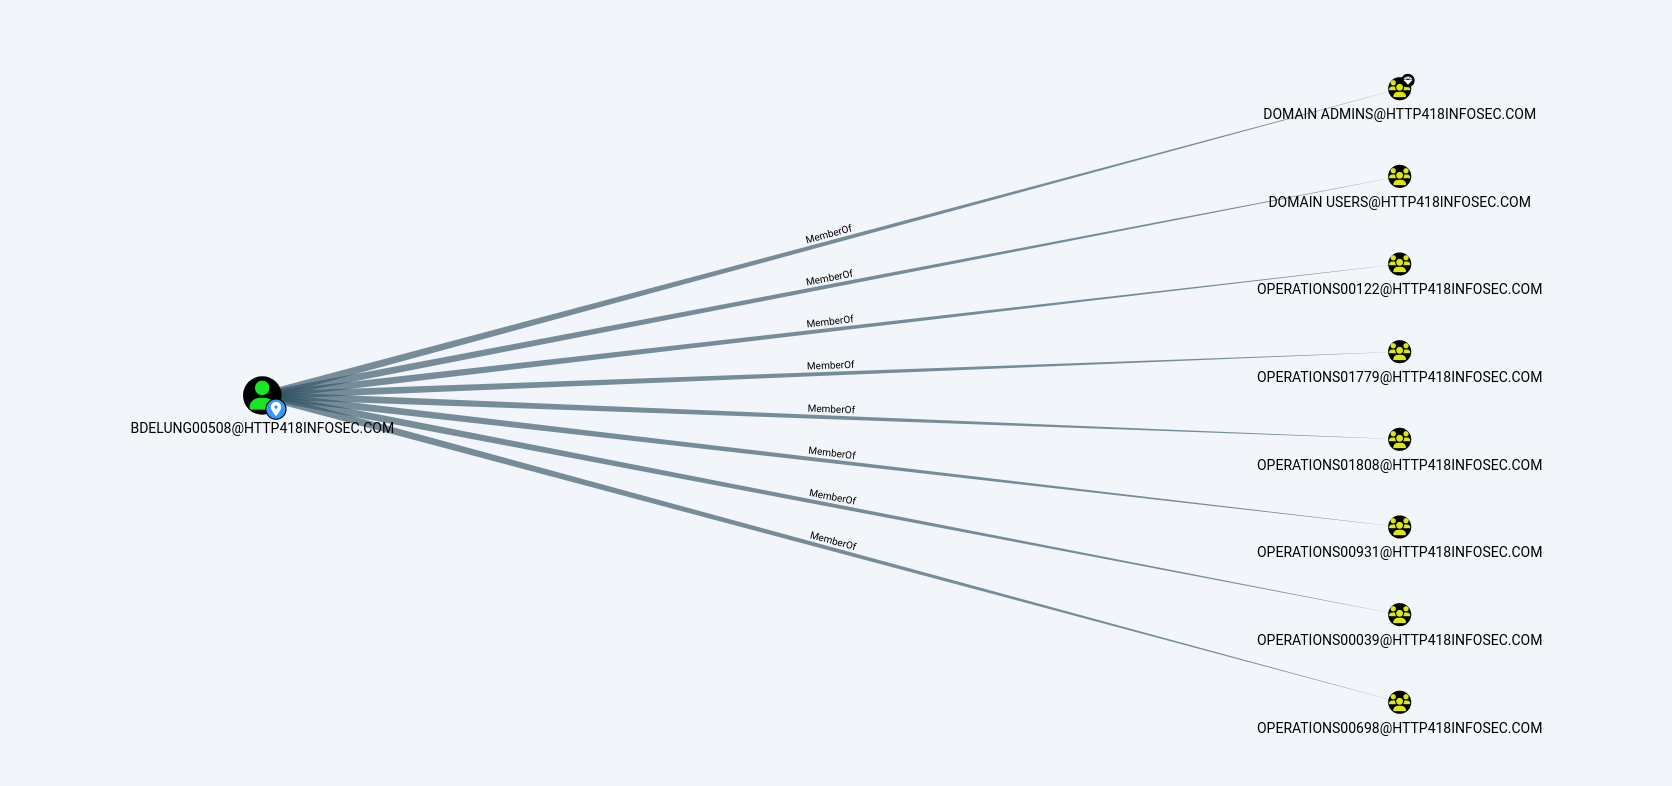
We can use this to show some basic information on the user, such as their name (Brendan Delung), when they last logged in (Sat 19th November 2022)
If we scroll down a bit to the Group Membership section, we can see the First Degree Group Membership entry. This complex name is another way of saying the groups which this user is a member of. From when we first loaded up BloodHound, we know that Brendan is a member of the Domain Admins group (i.e. DOMAIN ADMINS@HTTP418INFOSEC.COM). From the screenshot below, we can see that Brendan is a member of 8 groups (including the Domain Admins).

If we click on this row, BloodHound will run a query in the background to show the groups which Brendan is a member of in the graph view. The view now shows us the groups:
Another option to represent the groups which a user is a member of is the Unrolled Group Membership, which is below the First Degree Group Membership feature we just used.
This takes the output from above, and then checks if any of these groups are within other groups and so on. Again, by clicking on the row we can see the graph which it creates, showing a further 2 groups which BDELUNG00508 is part of:
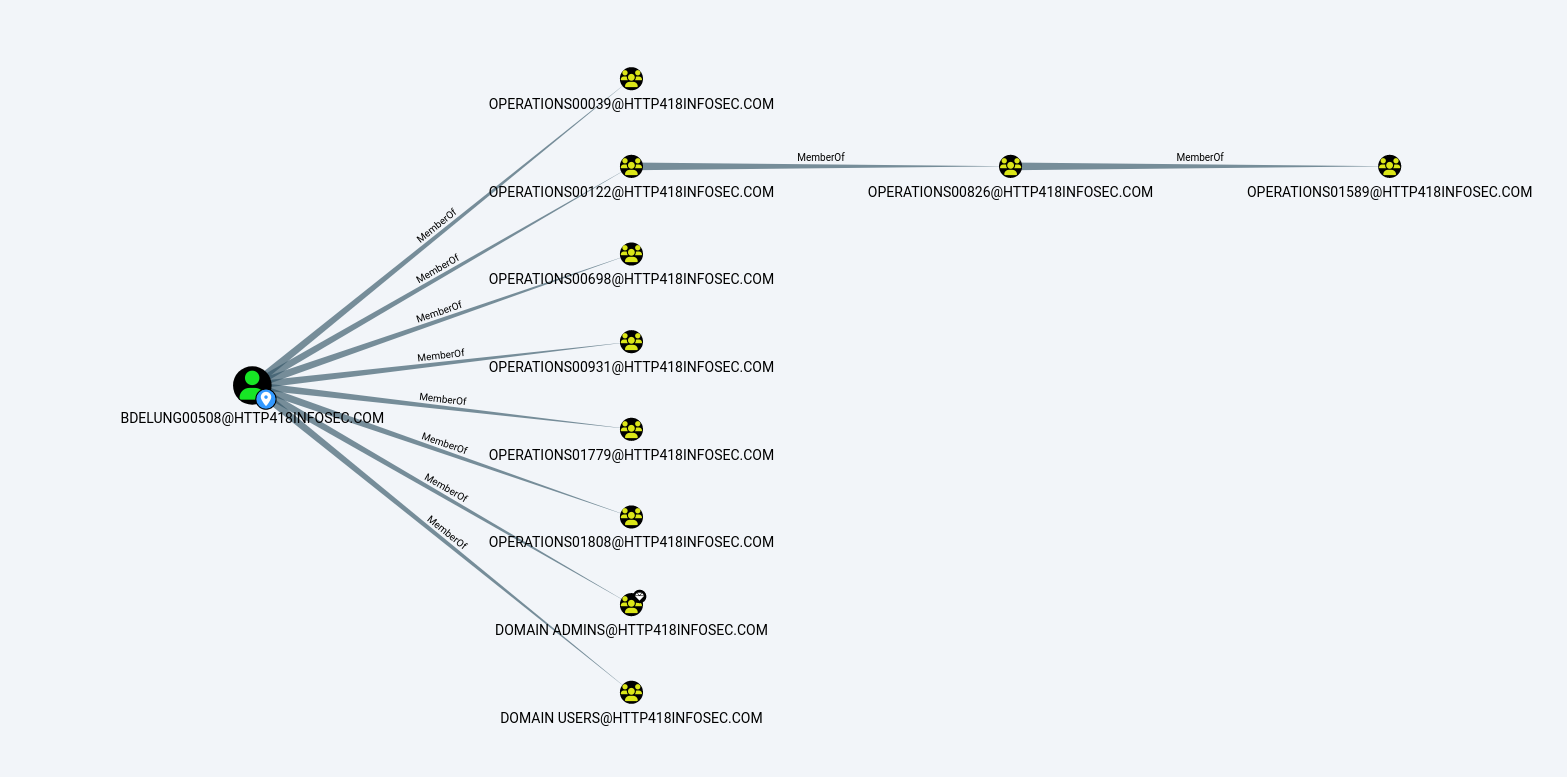
As we can see, the first ‘column’ of yellow nodes show the groups we could see before (Starting with OPERATIONS00039), but now we can see that the OPERATIONS0122 group is a member of another group (OPERATIONS00826), which itself is within another group (OPERATIONS01589)!
This shows the power of BloodHound, as running queries like this gets very complex with large environments. Whilst the output here is a little boring to us as an attacker, it becomes far more interesting if one of these unrolled groups has access which was not expected, such as local admin to a server.
Pathfinding
BloodHound allows us to find paths between AD objects easily, using the ‘Pathfinding’ option in the UI.

If we click on this icon, we can now enter a ‘Start Node’ and ‘Target Node’ – in other words, where are we and where do we want to get to.
In the context of a red team, the Start Node could be a user who has been phished, and the End Node could be the Domain Admins group (Or whatever we want to ultimately compromise), which would show attack paths to obtain domain admin rights.
We can also fill this detail in by right clicking on a node and then selecting either ‘Set as Starting Node’ or ‘Set as Ending Node’.
To show this, we will use DBERENDT00668 as our starting point.

As we type in a group, BloodHound will autofill suggestions:

After some thinking, BloodHound will show us an ‘attack path’ – the steps we would need to take as an attacker to become a Domain Admin user.
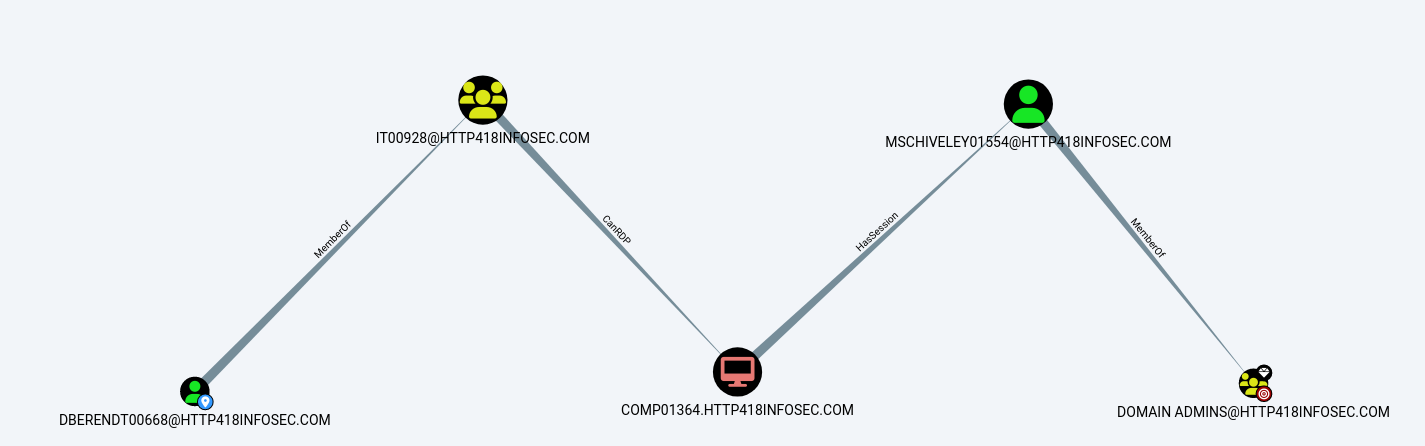
To explain the above attack path, DBERENDT00668 user is a member of the IT00928 group. Members of this group can then RDP onto the COMP01364 server. This server then has a session for MSCHIVELY01554, who is a Domain Admin user.
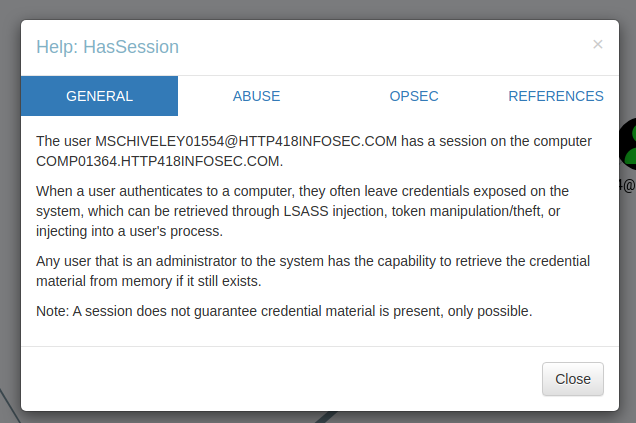
If we wanted to learn more about any of these permissions, we can right click on the ‘edge’ (The line between the coloured nodes) and then click on ‘Help’.

This will then give a short overview on how it could be exploited:
High Value Groups
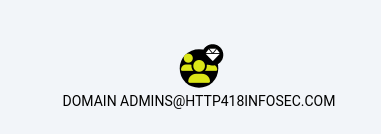
BloodHound has the concept of ‘High Value Groups’, which represent the traditionally highly powerful groups within Active Directory such as Domain Admins, Enterprise Admins and so on. In short, if any of these AD objects are compromised by an attacker, it is very bad news! In the graph view, these objects have a small diamond on the top right of their icon.
Owned Users
Another core concept is marking users as ‘owned’, which can be done by right clicking on a user and clicking on ‘Mark User as Owned’. This does two things:
- Marks the user object with a little skull symbol to show they are owned
- Allows us to filter on ‘owned’ users in our queries
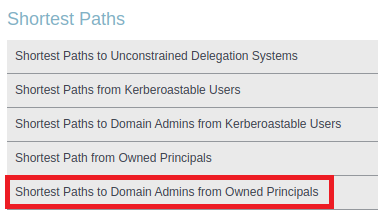
BloodHound has a number of queries to search from users who are owned – for example the Shortest Paths to Domain Admins from Owned Principals query, which will search from every owned user to find the shortest route to becoming Domain Admin.
I have found this feature to be very useful when combined with other datasets. For example, if a password spraying or cracking exercise is performed, then any weak accounts could be marked as ‘owned’. We can then use Bloodhound to highlight the issues posed by these accounts in a really visual way – showing just how ‘close’ a weak account might be to becoming a domain admin!
Moving Laterally
Another key use case for BloodHound is for attackers, when they have first landed in an environment and are looking to move laterally. If we assume that we have infected the DBERENDT00668@HTTP418INFOSEC.COM user, it would be time consuming to establish our access purely through LDAP or PowerShell queries.
If we load up the user, we can see that they have a lot of interesting outbound access. In the screenshot below we will focus on the Execution Rights section of BloodHound. This shows the permissions that our user has. For example First Degree RDP Privileges will show the servers where our user has been explicitly granted access via RDP.
The Group Delegated RDP Privileges will show servers where our user is in a group (or nested groups) which has been granted access to a resource via RDP. More information on how this could be abused can be found on the BloodHound wiki.
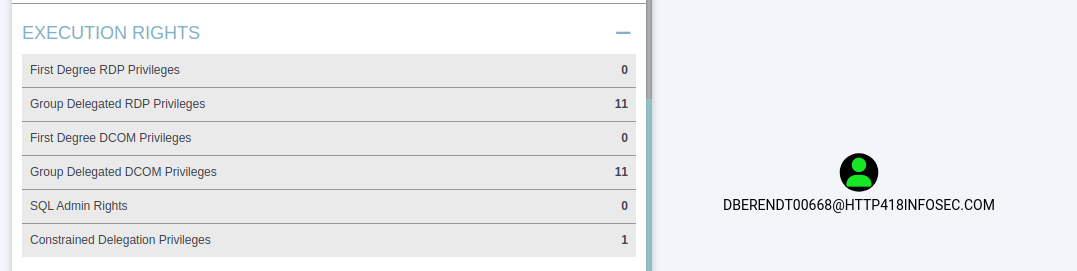
If we click on the Group Delegated RDP Privileges entry above, BloodHound will again render this into a graph for us – showing that 6 different groups are granting access to servers via RDP for this user.
Custom Queries
Finally, at the bottom of the graph view is the ‘Raw Query’ tab, which allows us to run our own custom queries in the ‘Neo4j’ language – which we will cover in my post on the more advanced usage of BloodHound. This allows us to run far more complex queries and quantify a lot of the data in AD rapidly.